photo kime5_zps3df5231d.png  photo kime6_zpsa90859c6.png  photo kime7_zps9d2ef86d.png  photo kime9_zpsb23b4278.png
Showing posts with label Mixed Media. Show all posts

Friday, December 29, 2017

Alcohol Ink Background Technique & Video


Hello crafty friends! I hope that you're having a wonderful holiday season. Thanks to a reduced work schedule (yeah for vacation time!), I have found more free time to create just for fun...that's the best crafting time! I had a bunch of tags left over from the LetterIT release and decided I wanted to use them in an art journal layout. The above project, combined with an alcohol ink background technique, was the perfect way to spend an afternoon! Close up photos below, along with a video and a link to my Big Picture Classes, which features the alcohol ink technique along with four others, all developed by Wendy Vecchi and focused on using her fabulous products! (All techniques demonstrated with Wendy's permission!) Happy Crafting!


See another alcohol ink technique, along with four others, in my Technique Tags class with Big Picture Classes. Click here!

Supplies: -Dylusions Art Journal - http://bit.ly/2C5dtCp -Specialty Stamping Paper - http://bit.ly/2lnUUOE -Alcohol Reinkers - http://bit.ly/2C5tybj -LetterIT Tags - http://bit.ly/2C6WvUA -Gesso - http://bit.ly/2puawn3 -Dina Wakley Paint - http://bit.ly/2CfmiZY -Wendy Vecchi Stamps (I used Just Sew Artsy, It's Face Art, & Art in a Jar) - http://bit.ly/2C6QkQ2 -Wendy Vecchi Mat Minis (I used Hearts & Stars) - http://bit.ly/2BOpk3D -The Crafters Workshop Gel Medium Matte - http://bit.ly/2qvGhLb

Friday, October 6, 2017

Wooden Shrines from Joggles


Hello friends! Today I'm sharing a mixed media home decor project on the Joggles design team blog. Head on over to their blog for more details and photos! Video tutorial is below, enjoy!

Sunday, September 10, 2017

Mixed Media Home Decor - Joggles & Frank Morrow Promotion

Oh my, crafty friends I am so excited about today's project! Joggles has just received a shipment of Frank Morrow metal embellishments and they are to die for! These are heavy duty metal pieces, and they are huge...perfect for art journals and home decor projects. I had such a blast creating with these pieces and I can't wait to share my project video, which you can check out below. Once you watch the video, be sure to head to the Joggles blog to see the all of the art created by the design team. Enjoy and happy crafting!

Wednesday, July 19, 2017

Mixed Media Canvas - Spread Your Wings


See prize drawing info at the end of my post!

I can't believe it's already been a year and a half! My design time with The Crafters Workshop has come to an end over more than a year of designing with their amazing products. It's been a great ride! TCW has always had a special place in my heart. I sold their products when I owned a store and their stencils were the very first ones I used when I decided to try out this new art thing called mixed media. Not only do they consistently produce a wide variety of stencil designs, but last year they introduced an incredible line of mixed media products, including paints, gessos, modeling pastes, and more. A HUGE thanks to the entire TCW crew! Thank you for selecting me to be on your team and for providing me with enough products to last me a lifetime!

Above are a few photos of my last design team post. I also created a video walking you through my creative process. This was actually a really quick and easy project and it was fun to use some Prima products that have been tucked away in my stash for years. I hope you enjoy and please offer your support to TCW!

And since this is my last TCW design team post, leave a comment on this post by July 28 to be entered into a drawing for a set of free stencils! Be sure to leave your contact info so that I can reach you if you're the winner!

Happy Crafting!

Supplies:

Friday, July 7, 2017

Joggles Mixed Media Canvas


Hi friends! I'm over on the Joggles blog today, sharing a mixed media canvas I created using some of their Flora & Frond stencils and masks. You can also watch my process video below. Enjoy!

Friday, June 30, 2017

Stained Glass Daisies Canvas

Hello crafty friends! I'm sharing a new project over on The Crafters Workshop blog today. Head on over and check out all of the details and project links. You can also view my process video below.

Tuesday, May 9, 2017

Transformation


Hi all! I have a new project posted on The Crafters Workshop blog and a new You Tube video. Head to the TCW blog to check out other photos or view the video below. Happy Crafting!


Thursday, March 23, 2017

Capture Love

I'm hanging out at The Crafters Workshop blog today, sharing the details of these piece I created using a discarded piece of cardboard, a brand new TCW stencil, and black modeling paste.

Head on over to The Crafters Workshop blog for step-by-step photos and instructions.

Tuesday, February 14, 2017

Love Family Mini Album


Hi all! Just a quick post to let you know that I had a project posted on The Crafters Workshop blog yesterday. You can find the post, with all of the photos, here. My video, outlining the creation of the album, is below. Happy Crafting!


Monday, November 28, 2016

Inspiration Wednesday Art Journal Layout

I know, I know, it's been ages since I've shared an Inspiration Wednesday spread. The reason for that is that it's been ages since I've created an IW spread! Isn't it funny how we tend to start out so excited about certain projects and then life happens and our projects get stuck on the back burner. I miss my bi-weekly IW creative time! And as you'll notice from the date on this layout, it's not only been a while since I spend time in my IW journal, but it's taken me far too long to post too!

I ended up picking up some more marketing contract work and that kept me hopping for a few months, making doing anything creative almost impossible. I also have a **surprise** announcement coming up in a few weeks, which came along with an immovable deadline, and made for some very busy days and nights. Be sure to keep an eye on your email for the surprise details...

Thankfully, the contract work has ended for the year and I am hopeful that I'll be able to catch up on the long list of half finished work I have sitting in my studio. (Oh, and hopefully I'll get to work on organizing my studio now that we've made some layout changes in our house, allowing me use of our entire extra bedroom! Call me excited!)

As for today's IW art journal layout...I think it's one of my favorites to date. If you have lots of extra letter stickers hanging around your art space (I confess I hoard them), then this is a great project for you. These two pages are covered in all shapes and sizes of letter stickers. I used foam Thickers, tiny stickers, glitter letters, and just about everything in between. 
I even managed to accidentally spell out A-OK...see that in the upper right hand corner? How fun is that? My favorite bit are all those tiny stickers...I layered them like crazy and the look, after applying layers of paint and glazing medium is nothing short of fabulous!
Another thing I am digging out this layout is that the foam letters and still squishy! Even after a layer of gesso, paint, and glazing medium, you can still push down on the foam letters...they're still soft! Talk about touchable texture...LOVE that! Here's a look at the complete spread...
If you're interested in Inspiration Wednesday, Donna has already posted a link for the 2017 lessons. The year long class is only $35, for the entire year, and includes an extra few class. I have so enjoyed this year's lessons and am looking forward to finishing my art journal (this will be my first completed journal!) and next year's lessons! You can sign up for the 2017 classes here. I've also been posting new videos to my You Tube channel. If you're interested in seeing videos when they're posted, click on over and follow my channel!

Happy Crafting!

Wednesday, May 25, 2016

Full of Grace Art Journal Featuring The Crafters Workshop Stencils

I'm hanging out at The Crafters Workshop blog today, sharing an art journal spread, featuring TCW stencils, embossing paste, Impression Obsession stamps, and lots of other mixed media products. Stop by the TCW blog for more photos and all of the details!

Monday, March 30, 2015

Life Book Lesson 13

It's time for another Life Book project!  And this one is by far one of my favorites!!  The lesson was taught by Juliette Crane.  I have a feeling that she's going to quickly become another one of my favorite mixed media artists.  Her work is all flowy and free form and she has a way to making drawing very accessible to those of us who are "drawing challenged."  For example, all of her animal drawings start out the exact same way...a circle and a rectangle.  Yeah, I think I can get behind those directions!

The other thing I loved about her work was how much she painted with her hands.  Finger painting is for me!  I'm will absolutely never be a fine artist...I simply don't have those natural talents nor the time to develop them, but give me some paint and no real rules?  Now that makes me happy!

This painting started with a background that I randomly covered with four different colors of paint.  (I used Dina Wakley's paint...love 'em!)  I then used the same four colors and started adding more paint with my finger tips...I just globbed and smooshed paint all over (oh, and I did add a bit of tissue paper first).  Then I added some darker blue around the edges, a touch of white, and the yellow for the moon.
The owl and branch was drawn with a Stabilo pencil and then I added paint (using my fingers and a palette knife).  I did need to go over the lines of my drawing a few more times and then I would activate the pencil with a water brush.  Just check out all of that gorgeous texture on the owl...it's dreamy!  I added a tiny bit of text stamping and then hand stamped by verse.  Unlike last week's lesson, which took me almost two weeks to complete, this project was finished in one evening.  I may go back and add a few more details (I'm always afraid of doing too much so I need to "sit" with this for a few days), but I just loved Juliette's style and I am definitely going to create more whimsical creatures...I can hardly wait!
 

Friday, January 23, 2015

Choose Joy

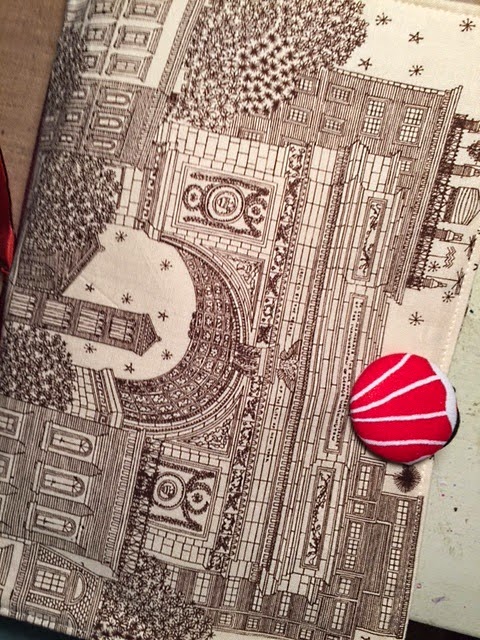
I spent part of the weekend with some of my favorite art supplies...Wendy Vecchi embossing paste, stencils (from Donna Downey and Seth Apter), and Dina Wakley paints...and I created a fun new art journal page.  To start, I picked up a Donna Downey art journal before Christmas (Merry Christmas to me!) and I love it...check out the pretty fabric cover...
 This is a small journal...around 6x9...and I love the smaller size; feels much more manageable when creating vs. tackling a 9x12 or larger piece of paper.  Also, the inside pages are super thick and sturdy and each page has an inclusion.  I'm really happy with this journal and imagine I'll be purchasing more of them in the future.

 A few weeks ago, Donna included a photo of one of her projects in a recent email blast about her new Inspiration Wednesday videos.  I loved the texture of her piece so I set out to create something similar.  I don't know how Donna created her piece, but these are the steps that I took to make my pages.  


I started by using a palette knife to add embossing paste over the entire background of my page and the inclusion.  I allowed this to dry overnight (it was thick!)  I then went back and used stencils and more embossing paste to add a second layer.  Allow to dry overnight.  Next, I gesso'd over all of the pages and paste.  Once that I was dry, I added my paint, starting with Dina Wakley's Night.  Once the first paint layer was dry, I mixed Dina's Turquoise paint and glazing fluid together (equal parts) and applied the paint over almost all of the Night painted pages.  Allow the Turquoise to sit for about a minute and then use a baby wipe to remove some of the Turquoise paint.  (This is a technique I learned from Donna Downey)
 The last layer was a combination of Dina's Tangerine paint mixed with Golden's Burnt Sienna.  This layer was lightly brushed on and then I used a baby wipe to blend.  The last thing I did was add a quote (from a Wendy Vecchi stamp set) and date tag, ala Donna Downey.  (I have to share that I love adding those dates tags...it is so much fun to go back through your journal pages and see what you were creating on a certain date.  Very cool way to see how your art progresses.)
When I finished both pages I thought, "hey, this looks like a Seth Apter page!"  Just goes to how we're influenced by the artist's work we most admire.  This ended up reminding me of the 52 Card Pick Up class that I took with Seth...very similar colors...and the texture is all Donna Downey.  And I love all of the texture...embossing paste to the rescue, that stuff is AWESOME, thank you Wendy Vecchi!  Now that my first pages are done, it's time to get to work on the rest of my journal...

Saturday, January 3, 2015

Life Book 2015

A few months ago I made the decision to sign up for Life Book 2015.  My decision was made after taking another online class where Tamara Laporte was an instructor.  I really loved Tam's approach to teaching and felt that I learned a lot about making faces and adding details.  This was our first week's challenge and I spent a good portion of January 1, 2015 creating ART!

I had a great time creating my girl and while there are many areas that could be improved, I'm excited that I stuck with it and completed the piece.  The page was created using graphite and Stabilo pencils and paints from Dina Wakley, PaperArtsy, and Golden.  I also added some chunky glitter that has been living in my stash for many years (I knew I'd use it eventually! LOL!)  The other fun thing I used was a tiny alphabet stamp set that I purchased years ago for next to nothing.  It's one of those sets I consider dumping every time I clean my studio.  So glad I didn't because they were perfect for adding my my own sentiment, or more precisely Scripture text (from Proverbs).  Here's my completed piece...Enjoy!
 

Saturday, December 13, 2014

Mixed-Ability Challenge - Inchies


Seems I keep running a week behind on the Splitcoast Mix-Ability challenges!  I actually had this card created just a few days after the challenge was posted, but am just now getting around the posting.  Ah, the holidays, they're keeping me hopping and away from posting!

Last week's challenge was to create a card using inchies.  Remember inchies?  Tiny little squares that can be used to decorate the background of a card or to highlight a particular image....It's also a great way to use up some of your gelli plate prints!  Love 'em!  

 My card started with some vintage text paper, pasted on a piece of chipboard.  I then added some embossing paste through a stencil.  Once the paste was dry, I mixed umber acrylic paint with glazing medium (use equal parts of both).  I brushed the paint on over the text/paste, waiting about a minute, and then used a baby wipe to remove the access.  What's left behind is a fabulously aged background!

I then used a 1" square punch to punch out four squares from a scrap piece of tag that had been covered with gesso and Distress Stains.  Each square was then mounted on a 1 1/4" square of brown cardstock.  I added the tiniest bit of black text to each square, using the Typewriter Text background stamp from Sweet 'n Sassy.  The little circle is from the Seeing Spots set (also from SNSS) and the image was embossed with Wendy Vecchi embossing powder.  I die cut a tiny butterfly shape, using the Monarch Dies set, and then stamped the detail using the coordinating Majestic Monarchs set.  Finally, I added a bit of gold twine around the bottom of the inchie piece before attaching to a plain card base.

Now...on to complete this week's Mix-Ability challenge!  Enjoy!

Supplies not linked above:


Tuesday, December 9, 2014

Moments Altered Clock

 I found a brand new (new to me) challenge last week and I had to play along!  It's the Mixed Media Place challenge, found it from following a link on France Papillon's blog (she's an insanely talented mixed media artist), and this month's challenge was to create a 3-D project.

I picked up a Prima clock months ago, along with a whole bunch of embellishments, and have had an idea on what I wanted to create for a while.  The MMP challenge made me spring into action as I realized I now had a "reason" to start this project!  (Why is it that we sometimes need a deadline to start and/or finish making art!)

I really liked the original finish of the clock...old metal...but I wanted to add either some dimension or additional color.  I wasn't really sure what direction my paint brush would take me so I decided to start with vintage book pages...you can never go wrong with vintage text!  Here's what my clock looked like after adding the text...
I just added random torn pieces of book paper, all edged with Gathered Twigs Distress Ink and applied with Multi-Medium Matte finish.  Once the glue was dried, I painted over the entire piece with a combination of Wild Honey and Rusty Hinge Distress Paint.  Humm...wasn't loving the look...the colors were too bright for me.  I added a hint of Polished Brass Distress Paint and then I called it a night.  (I forgot to take a photo of this step!)  When I got up the next morning and looked at the clock...I knew I had to cover the paint.  The color was all wrong...so I started to lightly add a layer of Beach Hut PaperArtsy paint.  The Beach Hut paint is slightly translucent so I could still see a bit of the other paint colors and the shimmer from the Brass paint was dreamy.  I started with light coats of the Beach Hut paint, knowing I could add more.  Here's the next coat of paint:
Isn't that dreamy?  Now I was getting the look that I wanted.  The text got a bit covered up by the layers of paint, but I really like the texture that the paper gives to the clock.  Now, you know I couldn't not add some brown to the clock so I got busy with Wendy Vecchi Potting Soil Archival Ink.  I needed Archival Ink, not Distress Ink, as I was going over acrylic paints.  I added the ink to all of the edges of the clock and any raised areas...
The addition of the Potting Soil ink really adds to the age and depth of the paint.  I adore it!  (Need to try this same technique on a canvas!)

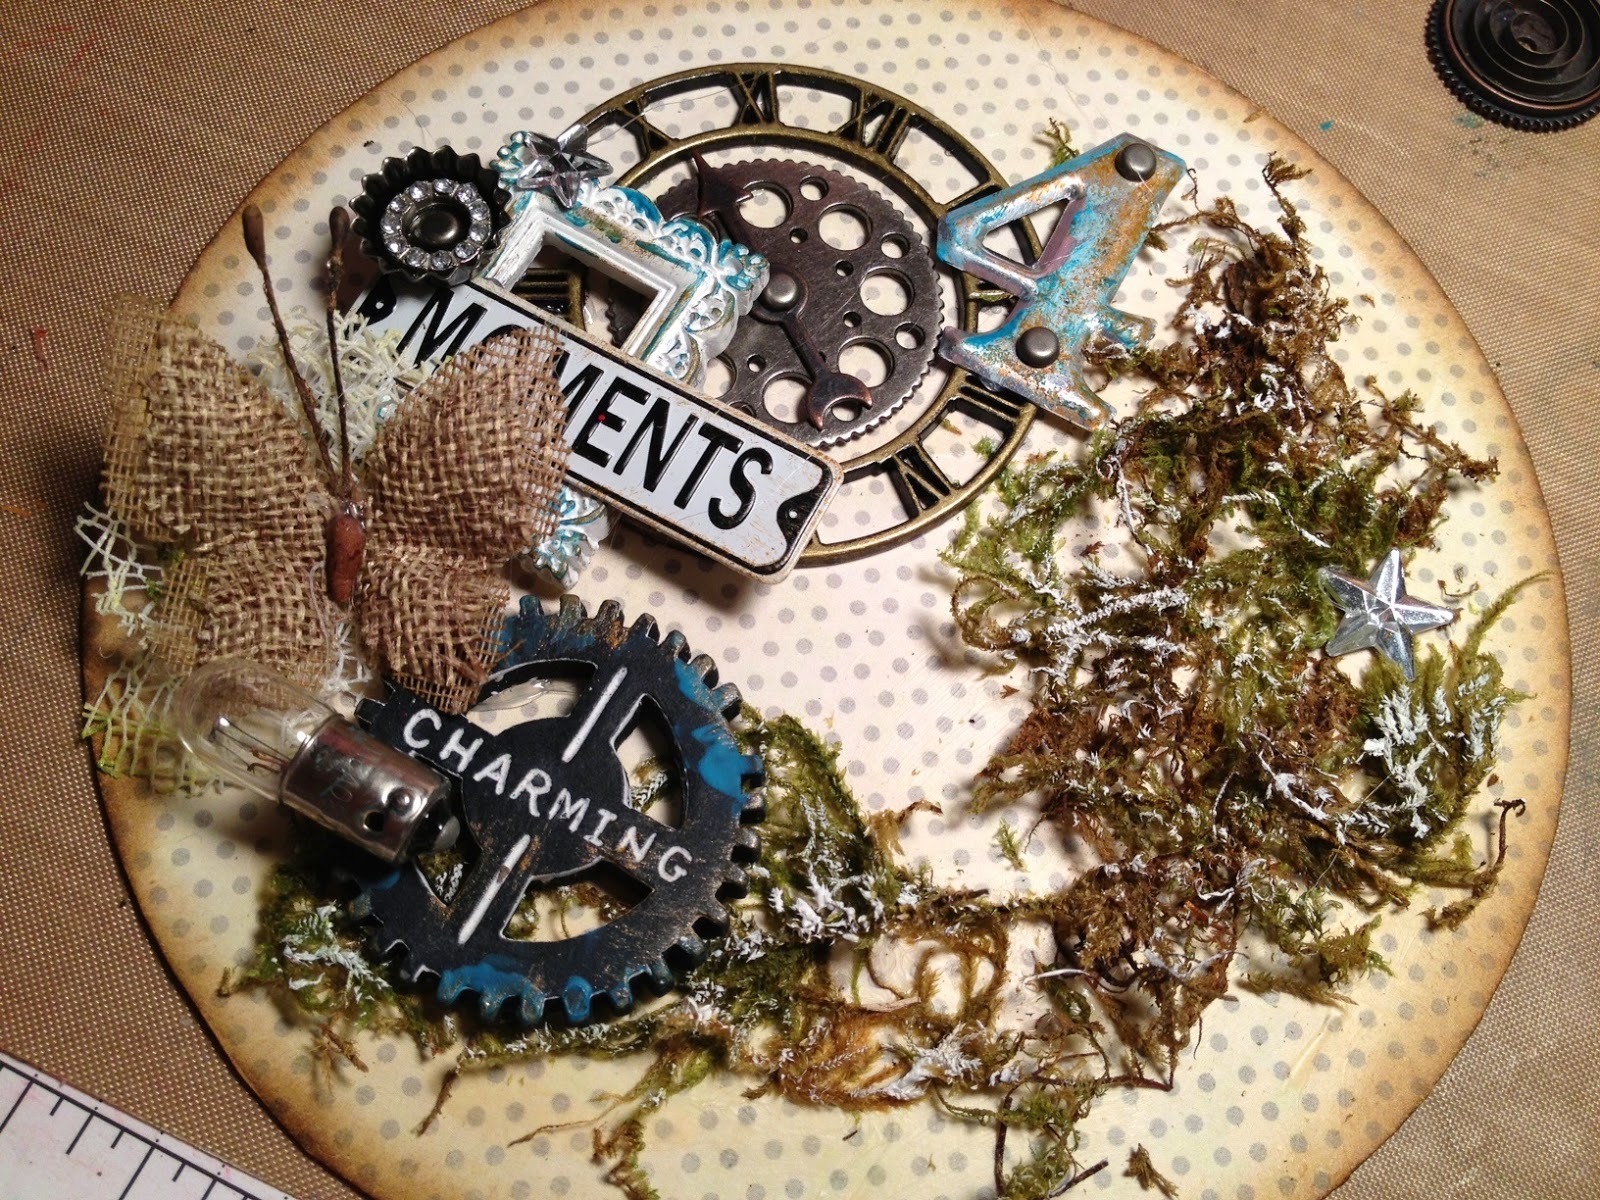
The nice thing about the clock is that the entire back can be removed so you can work on a flat surface..just like a card or mini canvas!  I added a whole bunch of embellishments, layering them all before I got busy with my glue gun.  I also added tiny bits of moss to the background and paint flecks on some of the metal pieces.  (Oh, I started by gluing down a piece of designer paper).  Here's the finished inside of the clock:
I knew that I was going to use a cut out photo of my boys as the centerpiece of the clock so I placed the photo on the clock back and then laid out the embellishments around the photo.  This helped me put everything into the correct spot and that's why the right hand side of the circle only has the moss...the photo will be standing in front of the moss.

Next I re-attached the clock back, added the photo cutout (my photo was printed on a matte, heavy weight cardstock), and got to work on the outside of the clock.  I added a bunch of metal embellishments (all colored with Teakwood Alcohol Ink so they would all be the same color), painted flowers, and moss to finish the decorations.  Below are some more close up photos of the outside:
I love the tiny bird nest...so cute and it works perfectly with the moss and mesh flower petals.  The metal swirls on top of the clock are lots of fun too!
I used a large metal swirl to add as a platform for the flowers (and burlap flowers are the perfect pairing with photos of sweet boys!) and once the flowers were attached, I hot glued the entire piece to the clock.  A few metal pieces, and these sweet resin gears from the Prima are the bomb!  The tiny hot air balloon is from a chipboard set, also Prima, that I've had in my stash for months.  Here's another view, looking inside the clock:
I'm just giddy about how this turned out and this piece is just perfect on our fireplace mantle (as shown in the first photo of this post).  I think my hubby is going to add a tiny light on the inside of the clock so that you can peek in to see all of the decorative goodness inside...of course my darling boys are the best part of the entire piece!!  Love those smoochie-boys!

Be sure to check out this month's Mixed Media Place challenge!!