photo kime5_zps3df5231d.png  photo kime6_zpsa90859c6.png  photo kime7_zps9d2ef86d.png  photo kime9_zpsb23b4278.png
Showing posts with label stencils. Show all posts

Sunday, March 1, 2026

Stencil Techniques for Cards


Hi all! It's been another hot minute! LOL! It's taken me a few weeks to put together this video as I've been working around my 9-5 job as well as uploading more products loaded into my Etsy story and learning how to create YouTube shorts. It's all a bunch of fun but time consuming! 

That said, I am excited to share a new video and five new cards featuring background created with stencils. I am a huge fan of stencils and they are so much fun to use with a variety of products, from inks to sprays to pastes. All of the techniques shown in this week's video can easily be translated to art journals and scrapbook pages. 

I hope you enjoy the video - would love if you subscribed - and please visit my Etsy store, Paper Petals, and my brand new Facebook page that will feature product highlights, notices when videos are posted, sales, and more!

Enjoy and happy crafting!


Visit me in my Etsy store, where I sell new and gently used craft supplies for less! Also, head to my new store Facebook page and follow for news, product highlights, sales, product tips, more!

Paper Petals Etsy store

Twice Loved Facebook page

Supply List:

The stencils are no longer available, but I found designs that would work well for these techniques:

·       Make Art Station

Card One (Ink Blending)

·       Distress Oxide Ink

·       Concord & 9th Blended Petals stencil set

·       Concord & 9th Blended Petals die set

·       Concord & 9th Hello Lovely (the Blended Petals stamp set is no longer available, but this set would work well)

Card Two (Embossing Paste)

·       Wendy Vecchi Fancy Flowers stencil

·       Wendy Vecchi Classic Words stencil

·       Wendy Vecchi Essential Envelope Die Set

·       Altenew Ink Cubes

Card Three (Emboss Resist)

·       Long Leaves stamp set (Kristina Werner)

·       Concord & 9th Mix & Match Everyday Sentiments

·       Embossing Paste

Card Four (Alcohol Ink)

·       Specialty Stamping Paper

·       Alcohol Inks

·       Wendy Vecchi Heartfelt Art

·       Avery Elle Loads of Hello

Card Five (Ink Sprays)

·       Dylusions Ink Sprays

·       Concord & 9th Flower Shaker Shapes

Wednesday, November 29, 2017

Ranger LETTERit Release - Six Technique Cards


Hello friends and welcome to today's exciting announcement! Ranger Ink has just announced a new series of products, LETTERit, that is geared towards card makers. Woot! Woot! We have always known Ranger for their wonderful Distress Products and other crafting mediums, and now we can look to them for the production of beautiful sentiment stamps, various kits, including embossing and Perfect Pearl kits, metallic pens, and more! Read more on Ranger's web site.

I've created a video that walks you through each of the new products and showcases six unique cards, demonstrating a variety of techniques. Each of the cards focuses almost entirely on using only the new LETTERit products. You'll be amazed at the creative options available by using the kit supplies.

Scroll through the photos below to see a close up of the cards that I created and then enjoy the short video that follows to see how each of the projects came together. A supply list can also be found at after the video. Interested in purchasing LETTERit products? Visit your favorite craft supplier retail store! Enjoy and happy crafting!

The card above sums up my feelings on being selected to participate in the new product release...GRATEFUL!! A big thank you to Ranger for allowing me to play with the new goodies!


Supplies:

Friday, July 7, 2017

Joggles Mixed Media Canvas


Hi friends! I'm over on the Joggles blog today, sharing a mixed media canvas I created using some of their Flora & Frond stencils and masks. You can also watch my process video below. Enjoy!

Monday, October 5, 2015

Introduction to Art Journaling Class Details

Hi all! My next Michaels class has been scheduled! Full class details are below:

Location: Michaels in Epping, NH
Class: Art Journal Techniques
Date: October 23, 2015
Time: 6:30-8:30 pm
Cost: $15

This class we'll explore a variety of mixed media techniques as we create an art journal cover. I'll demonstrate the use of different mediums, including gel medium and modeling paste. We'll also review collage techniques, stenciling, and shading using Faber Castell Big Brush Markers. You'll leave the class with a completed art journal cover and lots of blank art journal pages ready for more art!

Please contact the store directly to register for this event. Below is a list of supplies that you either need to bring or purchase for this class:


Friday, August 28, 2015

PaperArtsy Challenge #16 - Circles

Greetings crafters! Today I'm sharing a project that I created for a PaperArtsy challenge, which was to use circles in a project. 

Circles are a favorite design element for me and one that shows up often in my art journaling projects so I couldn't wait to make something for the challenge! I even took a few photos of the process so you could see the steps I took to make my page.

My page actually started out as a gelli print. This was a print created with the new 6" Gelli Plate and a variety of texture sheets. This might have even been my scrap piece of paper that I used to clean the gelli plate....all I know is that it's been included in my pile of "partially completed art journal pages" for months!
I then added a whole lot of stenciling! I used paints from Dina Wakley and PaperArtsy, along with Jet Black Archival Ink. Stencils are from The Crafters Workshop and Donna Downey. The goal of creating this page was to use a lot of color and pattern...I think I accomplished that goal! Normally my backgrounds would be a combination of colors that are closer to each other on the color wheel, for example, blue and green tones vs. the combo that's on this page. There's a method to the madness!
Next, I used a Stabilo pencil to draw circles all over my page, making sure the circles were different sizes and drawing some as only half circles. Yes, you should always have a portion of your design flowing off of the page, 'cause that's what Julie Fei-Fan Balzer told me...
Take your water brush and go over all of the Stabilo lines. For those of you who don't owe Stabilo pencils...go get some, like 10 or 12 of them...you can't live without them...seriously, coolest pencil ever! You can purchase them at MisterArt. Now here comes the scary part...
Cover your entire background with a dark paint! AAAHHHH!!! This is the scariest and best part ever! I took a Julie Fei-Fan Balzer class last year and she encouraged this kind of crazy behavior! I accepted her challenge and I've never looked back! WooHoo! This is pure magic...I am crazy over the look of the purple paint (Blackberry Violet from Dina Wakley) in contrast to all of designs peeking through the black-lined circles. It's drama, baby!
I added some circle images from the Don't Forget to Fly stamp set, designed by Finnabair, stamped in white ink, which looks fab on that dark background. I aged a small manila tag with Gathered Twigs Distress Ink, added a cardstock circle, surrounded by more Stabilo and some black thread, and the sentiment (also from the same Finnabair stamp set). The butterfly was stamped on designer paper, fussy cut, and adhered with a glue dot. I added some glass beads (from Liquidtex) and glass glitter, also from Finnabair (glass glitter ROCKS!) The metal pen nib is from Timmy (Holtz, that is).

I hope you enjoyed today's project! Be sure to check out all of the other wonderful creations posted on the PaperArtsy blog!

Oh, and the entire eclectic Paperie store is 50% off today! Use code BIGNEWS50 when checking out!

Monday, July 27, 2015

ColorBurst and Homemade Stencils

I'm sharing a quick photo tutorial, using ColorBurst, on the Sweet 'n Sassy blog today. Head on over and check out all of the details!

You can purchase ColorBurst watercolor powders at eclectic Paperie, here.

Friday, January 23, 2015

Choose Joy

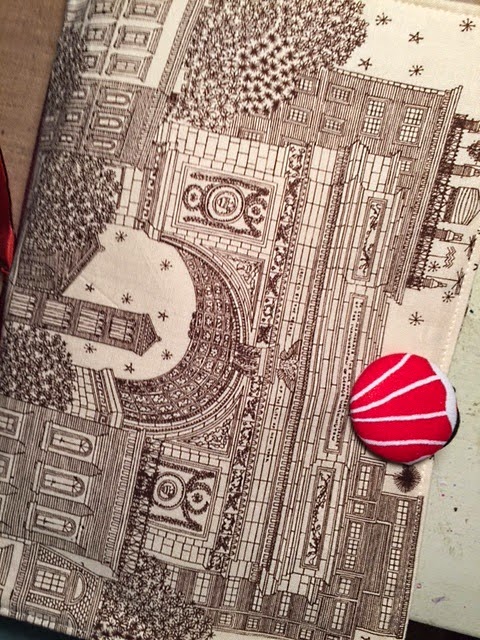
I spent part of the weekend with some of my favorite art supplies...Wendy Vecchi embossing paste, stencils (from Donna Downey and Seth Apter), and Dina Wakley paints...and I created a fun new art journal page.  To start, I picked up a Donna Downey art journal before Christmas (Merry Christmas to me!) and I love it...check out the pretty fabric cover...
 This is a small journal...around 6x9...and I love the smaller size; feels much more manageable when creating vs. tackling a 9x12 or larger piece of paper.  Also, the inside pages are super thick and sturdy and each page has an inclusion.  I'm really happy with this journal and imagine I'll be purchasing more of them in the future.

 A few weeks ago, Donna included a photo of one of her projects in a recent email blast about her new Inspiration Wednesday videos.  I loved the texture of her piece so I set out to create something similar.  I don't know how Donna created her piece, but these are the steps that I took to make my pages.  


I started by using a palette knife to add embossing paste over the entire background of my page and the inclusion.  I allowed this to dry overnight (it was thick!)  I then went back and used stencils and more embossing paste to add a second layer.  Allow to dry overnight.  Next, I gesso'd over all of the pages and paste.  Once that I was dry, I added my paint, starting with Dina Wakley's Night.  Once the first paint layer was dry, I mixed Dina's Turquoise paint and glazing fluid together (equal parts) and applied the paint over almost all of the Night painted pages.  Allow the Turquoise to sit for about a minute and then use a baby wipe to remove some of the Turquoise paint.  (This is a technique I learned from Donna Downey)
 The last layer was a combination of Dina's Tangerine paint mixed with Golden's Burnt Sienna.  This layer was lightly brushed on and then I used a baby wipe to blend.  The last thing I did was add a quote (from a Wendy Vecchi stamp set) and date tag, ala Donna Downey.  (I have to share that I love adding those dates tags...it is so much fun to go back through your journal pages and see what you were creating on a certain date.  Very cool way to see how your art progresses.)
When I finished both pages I thought, "hey, this looks like a Seth Apter page!"  Just goes to how we're influenced by the artist's work we most admire.  This ended up reminding me of the 52 Card Pick Up class that I took with Seth...very similar colors...and the texture is all Donna Downey.  And I love all of the texture...embossing paste to the rescue, that stuff is AWESOME, thank you Wendy Vecchi!  Now that my first pages are done, it's time to get to work on the rest of my journal...

Monday, September 8, 2014

Hold on Tight to Your Dreams

I created a new tag over the weekend, featuring a Gelli Plate background.  Video demonstrating my technique below!  Enjoy!


Friday, May 31, 2013

As a Tree

Hey lookie...I made a tree!  It's the little things in life that make me happy...like having a thought in the middle of the day and seeing it work out perfectly in the evening.  That doesn't happen often but it's pure joy when it does and makes all the other not so perfect times fade into the background.

The idea for today's tree actually came from a Donna Downey online class I took a few months ago where she used her fingers to paint some flowers.  I figured if Donna could make flowers I could make leaves, right?  Here's how I created these art journal pages.

I started by slapping some Distress Paints onto two of my art journal pages.  I used water to wet down the pages, before applying the paint, and then used my fingers to move the paint around (the journal pages absorb the water quickly so you don't get quite as much movement from the paint as you would on a smaller surface, like a tag).  Once the paint was dry there was a tree shape on the left page...see it?  I drew a rough outline so I'd know where to put the tree and then got busy with more paint!
 I painted the tree trunk first, using Golden paint as a base and then adding a few swipes of other colors (yellow/white) to give the tree a bit more texture.  (Links to all products at the bottom of my post).

To create the leaves I put four different colors into a plastic cup (three greens and a yellow), then I dipped my finger tips into the paint and starting putting paint down on the pages.  I just kept dabbing with my finger tips until I was happy with the look of the leaves.  Love it!  I then added a few tiny circles, using a stencil and more acrylic paint.  (The paint ran a bit too much through the stencil...but I can live with that...just add another layer!)
I used White Linen ink spray with the Blazonry stencil, you can just barely see the design in the background, and then the Chevron stencil with more yellow paint.  During Dina Wakley's class, taken a few weeks ago, she recommended staying in the same color family when adding colors and that's what I did with this page.  It was the perfect recommendation and really helped me keep this page from getting too crazy as there were already enough colors in the background.
 At this point...I needed black!  So I used a Wendy Vecchi stencil and Black Soot Distress Ink to add the words and numbers.  Love this stencil!
 I added a sentiment, using letter stickers, and a Grow tag (stamp from a Wendy Vecchi set, link below) with the date.  Using the half a tag for a date is totally a Donna Downey thing but I adore it so Donna...don't hate me because I've stolen your idea...it's fabulous and I love it!
 Oh yeah...and then I needed splats of colors...but of course!  The deep orange is watered down acrylic paint that I picked up with a brush and flicked all over both pages.  Love that splatter!!  And that, my friends, is how an idea turned into reality!!  Enjoy!!  Links below!
Products used on this project:

Dylusions Art Journal
Adirondack Paints (Terra Cotta, Willow, Lettuce)
Distress Paints (Salty Ocean, Spiced Maralade, Peeled Paint)
Golden Paints (Yellow Ochre, Burnt Sienna, Green Gold)
Distress Ink (Gathered Twigs, Black Soot)
Chevron Stencil
Tiny Circles Stencil
Blazonry Stencil
Classic Words Stencil
Dylusions Ink Spray (White Linen)
Original Art Stamp Set