


Hello friends and happy new year! I'm wishing you the very best for 2016! Today I'm sharing some highlights from this year along with some of my new favorite products...you know, so you can start those 2016 shopping lists!
I can hardly believe that 2015 has already come to a close. Maybe it's just me, but it seems that the older I get the faster that time passes. This has been one of the most interesting, challenging, and unpredictable years for me personally and our family. Here are some highlights (I'm feeling a bit wordy tonight so feel free to scroll past the personal stuff!):
- Selling eclectic Paperie to The Funkie Junkie - This was both a hard and an exciting decision. I loved, loved, loved owning a store...it was a dream come true. The connection you make with people who share a common interest in art combined with the ability to be immersed in creative endeavors each day was an incredibly rewarding experience. However, the toll that being the primary person responsible for every aspect of owning a store was all consuming, which is great if you're a single person, but is a real challenge if you have a family. That aspect, combined with the harsh reality that you spend much more than you make when you own a small business, made the decision to sell one that needed to be made. While I still do fantasize about owning another store, I have no regrets about moving on and am thoroughly enjoying my free time.
- Job Loss - Almost 20 years with one company, half of that time spent working from home, and my sweet husband got laid off. It came as a complete shock. While there were rumblings of layoffs, my husband's group had never been affected by previous layoffs. This time his team was reduced by 30%...basically the people that had the highest salaries and who had been with the company the longest. What's sad, and is still sometimes hard to stomach, is that there were some in his group who probably should have been fired...and they were safe...and then my husband, who had nothing but glowing reviews for 17 years was the one selected. Of course we know that these circumstances don't happen outside of God's providence, but the sting of those decisions can still sometimes be felt. Now we're getting used to an entirely new routine, where my husband is no longer working from home and I'm the main caregiver to my children. It's been a challenging (I miss my hubby) and rewarding (I feel closer to the kids) experience. He loves his new job...but I'd take him working from home again in a NY minute!
- Moving - Wow...that was a biggie and completely unexpected! We've been in CT almost a month now and we're starting to feel a little more settled, but I miss NH like crazy! I LOVE NH and loved living there...I never thought that I'd live anywhere else. What's funny is that my husband and I often talked about moving to a less expensive area (PS - CT isn't it! LOL!), but the reality of moving is far different than having conversations about it over the dinner table. There are a few important things I've learned about myself in this process (and not all of it good!). I'm not as grateful as I should be and I complain far too much. My husband was unemployed for almost seven months and he found a job...a good job...one that he really loves. And instead of being grateful, I've found ways to complain about it too often. I routinely teach my children to be thankful, and yet, in my private thoughts and conversations with my ever patient husband, I grumble. In 2016, I'm going to try very hard to be really, truly grateful for God's blessings...and there are blessings...too many to even name, even when you have to leave everything behind. We don't know what the future holds for us in CT, or if we'll move again, but we are trusting in the One who holds the future...firmly...in His capable hands.
And, with those three highlights from this year...let's get on with the product enabling for next year.....You're welcome... :-) (These photos also represent some of the goodies I've been playing with during our Christmas vacation...)
Number one on the list...Stamp Carving! I've followed Julie Fei-Fan Balzer's stamp carving adventures for a few years now, but never felt compelled to carve my own stamps until a friend had me over for a stamp carving gathering. One stamp in and I was hooked! I went out and ordered all of the supplies, watched videos, and have jumped in with two feet. It's a super easy process, although can be time consuming, and the results are so much fun! My kids have even created their own stamps!
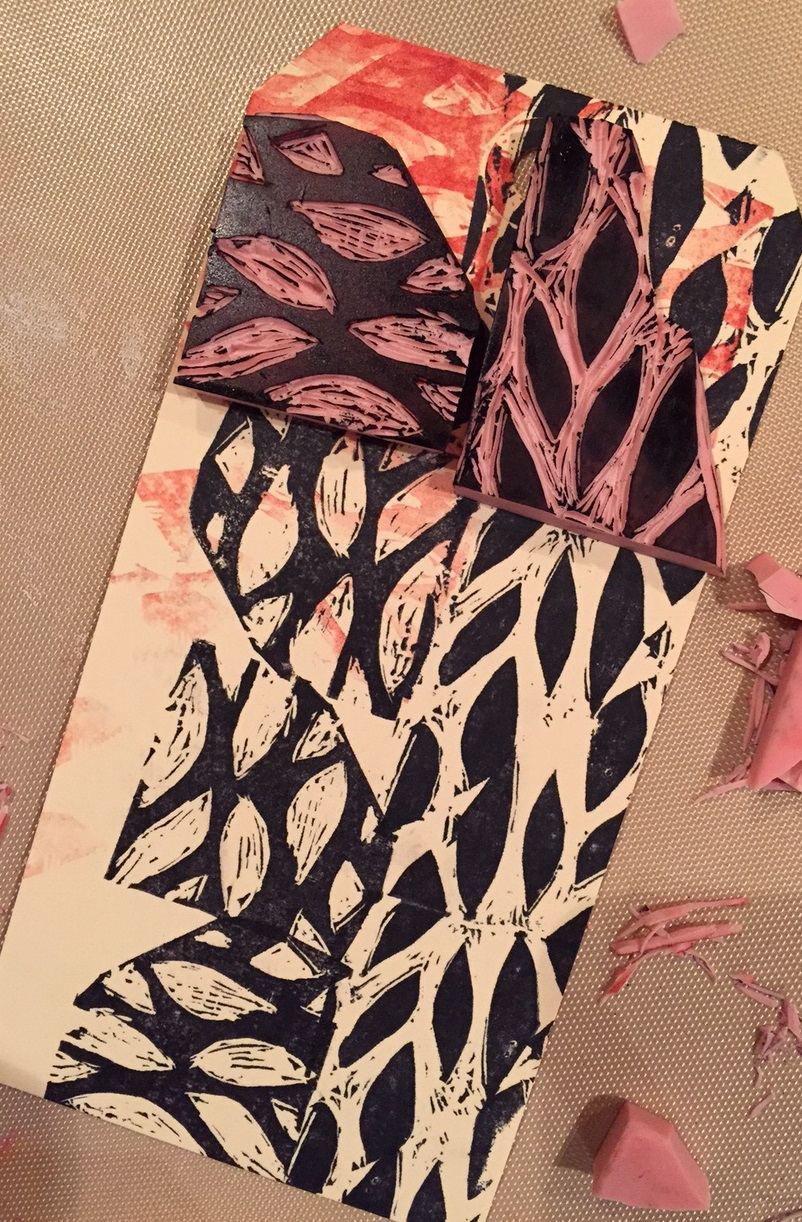
My nine year old made these stamps! We simple traced a stencil design, from Dina Wakley, Leafy, and he spent a good hour carefully carving out the stamps. He loves them and has even starting to create his own art journal. How cool is that!?

This was a stamp I created while hanging out and drawing with the kids. I wasn't really trying to be super careful or precise, but I still loved the results. I love the look of those lines (basically areas that could still be carved away) around the flowers...so vintage!

How cute is this one?! This is a stamp I carved for my 11 year old...it's a little Yokai (think Pokemon) figure. He was so excited with the finished product and I can just see him stamping this little guy on any outgoing mail!
Want to try stamp carving? Here are some helpful links to the products that you'll need:
-Julie's CarvedDecember Projects (for inspiration!)
-Julie's Book, "Stamp, Carve, Play"
-You'll also need a ruler, ink pads, and ballpoint pens or Sharpies
Next up...Gelli Plate printing!
Gelli printing is so much fun! You can create all kinds of custom background, using just acrylic paint, stencils, and even household items. I finally purchased some deli paper (link below) and spent an evening creating a bunch of prints. The prints below were all made using the exact same color paints and the exact same stencils. Can you even believe how different they look? I can't wait to use these pieces in my art journal and to create cards...love! (The one in the lower and upper right are my favs...)

Want to explore gelli printing? Gelli Arts shares a ton of great videos on their You Tube channel and their Facebook page. Check out the following links:
-Gelli Arts (They just introduced some mini plates that are to die for...I'm giddy!)
-Gelli Plates at Dick Blick
-Brayer (a must have item)
-You'll also want to have stencils, acrylic paint, and any other mark making tool on hand
Third on the list...and a new product for me...Art Foamies! Art Foamies are very sturdy foam stamps. Each stamp comes with a stamp buddy, which can be used to create custom ink pads, utilizing acrylic paint. The Art Foamies are great for use in art journals and even on walls! They are super fun! And...Julie Balzer just introduced her own line of Art Foamies...so you know I had to get a few.

This is probably one of my favorite designs and the large size is perfect for art journals. For these pages I started by painting them with black acrylic paint. Once that I was dry, I loaded up my stamp buddy with two colors of Dina Wakley paint. (Tip: You're going to need a lot of paint to fully load the ink pad). Once the pad is loaded with paint, press the Art Foamie stamp onto the ink pad and stamp away! It took a little practice to figure out how much pressure to apply to the stamp....as evidenced by some of my smooshy images. I found that you do not need to press hard, but you need to apply gentle, even pressure to the entire stamp. I think I'll probably add some gel pen doodling to this page...


Here's another of Julie's new designs. Since I was just playing, I stamped this sweet flower all over two art journal pages. We'll see what I end up doing with these pages in the future...
Want to check out Art Foamies?
-Julie Balzer Video on using the Art Foamies

This is just a quick little project, featuring paint that was left on my gelli plate and packing tape. This just might be the best and coolest way to clean your gellli plate! You have to check out the video here.
Lastly, I'll leave you with two photos that I just have to share...


Whew! You still with me? This was a long post! I wanted to share some of the projects we've been working on during our vacation. We're back to school and work next week...back to our regular routine. I hope you enjoyed seeing a few of my favorite things and I hope to be back with a finished project next week!
Best wishes for a very happy new year!
XXOO


