photo kime5_zps3df5231d.png  photo kime6_zpsa90859c6.png  photo kime7_zps9d2ef86d.png  photo kime9_zpsb23b4278.png

Friday, February 13, 2015

Life Book Week 6


Sharing my latest Life Book project for week 6.  This was a super fun project, taught by Tamara Laporte, even if it made me realize that I'm not a doodler! LOL!  I know some find it relaxing, but I'm far too Type A personality to sit still for long enough to doodle.  So...my piece has the basic outline of some flowers, with minimal doodling.  What I did adore about this piece was the color blocking.  Oh man, those areas of bold, bright colors is just amazing.  I liked the color blocking so much that I created some new journal pages incorporating this idea...will share those once that project is completed.  The one thing I would change about this page is that my black lines need to be thicker.  Time to go on the hunt for a thicker black marker...Hello, Fude Ball?  We need a wider marker tip! (Fude Ball pens really are the bomb for writing over paint...perfection!)

Friday, February 6, 2015

Sweet 'n Sassy Release Day

Hello, sweet friends!   Welcome to the Sweet 'n Sassy Stamps February 2015 Release Day Blog Hop! Baby…it's cold out there, but our February release is sure to warm your heart so grab your favorite hot beverage and get ready to be inspired by the projects created for you by the talented Design Divas!

Release Giveaway!
As part of our release day fun, one random commenter from one of the DT blogs will be selected to win a $10 Gift Code for  the Sweet 'n Sassy Stamps Store.  You have until Thursday, February 12th at midnight EST to leave your comments.  The winner will be posted on the Sweet 'n Sassy Stamps Blog on Friday, February 13th!

Below are the cards I created with February's new sets!  First up, Winter with Winnie (how hysterical is that sentiment!)
 Next is another Winnie set, Winnie's Warm Wishes.  This card also features the new Keep in Touch stamp set (the background features many of the sentiments included in the set).
My favorite this month, Get Well Critters.  Feeling fowl?  Snicker...
Loved this set so much...had to make a second card!
One more thing before we let you go...

We can't forget our fun Release Day Challenge!
Since the cold winter month of February often brings with it a case of the sniffles, create a warm get well card and join our...
"Warm Get Well Wishes Challenge"   

Just a few guidelines to remember as you play:

            
- You don't have to use a Sweet 'n Sassy Stamps image to enter (although we sure love when you do!)
- Please create a NEW card (no back linking)
- We ask that you enter your card in no more than 3 challenges
 - You'll have until Thursday, February 12th at midnight EST to enter

- We'll draw 1 winner from this week's challenge to receive a $10 credit to the Sweet 'n Sassy Stamps Store!  
If there are 25 participants, (not including the DT), we'll draw 2 winners!
- Please use code SNSFEB2015RC when uploading to Splitcoaststampers or other galleries 

To enter simply share a link to your creation below!

Thanks for joining us today!  Be sure to join us again on Friday, February 13th to see if you've won!

 Now it's time to see what the DT has created with these fabulous products!

February Make ART Challenge - Hearts

Hi folks!  I'm back with a project created for the latest Wendy Vecchi Make ART Challenge!  This month's challenge is to use hearts on a project...you know, to celebrate LOVE!

I started my card by created all of the individual pieces....(All of the images are from the My Kind of Art stamp set).  The pitcher is embossed with Cornflower Blue embossing powder; Gathered Twigs has been added to the edges.  The heart is a mix of Dina Wakley acrylic paint and Wendy's Crackle Paste.  (Isn't that crackle delish?!)  The flower was stamped twice and colored with watercolors.  I cut out one entire flower and then a portion of the second flower, to create multiple flower layers.  A button with twine finished the flower.

My card background is a piece of vintage book text, covered with a bit of Gathered Twigs ink and Wendy's tiny cross stencil.  I then layered a piece of designer paper, with an oval die cut, on top of the text paper and then added a black frame, created using two Spellbinder oval dies.  Each little scallop on the frame got a silver dot, thanks to a gel pen.  I also added Gathered Twigs over the edge of the entire card and added some faux stitching, from Wendy's Just Sew Artsy stamp set.  Finally, I added the sentiment and a star (from the Little Bits stencil).  Viola!  Hope you enjoyed today's card and be sure to check out this month's challenge!
 

Wednesday, February 4, 2015

You Have My Heart

That's right...I made a scrapbook page!  I actually made four pages a few weeks ago, after spending an evening with some fellow crafters, aka scrapbookers.  I came home with a fun little kit full of paper and embellishments that was begging to be used.

I have a great frame hanging in my living room, which is made to showcase 12x12 scrapbook pages.  It's a great way to easily change your artwork!  I figured it was about time for me to create a few new pages for my frame, featuring my kids now vs. them four years ago!

Here are a few more shots of this page....super easy to create, just a bunch of layering of papers and adding embellishments.  A whole lotta love...just in time for Valentines!

Enjoy!
  Aren't those sweet tart brads to die for?!
 The chipboard pieces are super beefy...really thick.  I love them.  And I thought the paint swatch paper was so clever.  And those two cute boys...they're a-ok too...I think I'll keep 'em!

Friday, January 30, 2015

Life Book Lesson #4

Just a quick post today...our entire household has come down with the flu...it stinks and we all feel awful.  I feel slightly less awful right now so I'm taking this opportunity to try and get a little bit of work and posting done before going back to my recovery spot on the couch.

This was our fourth lesson, a mini lesson, and let me tell you...it was hard!  The face was actually the easiest part and I love this style...super quick and easy, not too fussy, just perfect.  Adding a body was a whole other issue!  The script around her waist reads "this was hard!" LOL!  I got the proportions all wrong the first time and I had to gesso over everything but her head and start again.  The second time around was better, but still could still use some work.  I did really enjoy the lesson and the look of this girl so my message to myself is to "be brave" and try another ballerina girl again in the future!

Enjoy!  And now...back to the couch...

Friday, January 23, 2015

Choose Joy

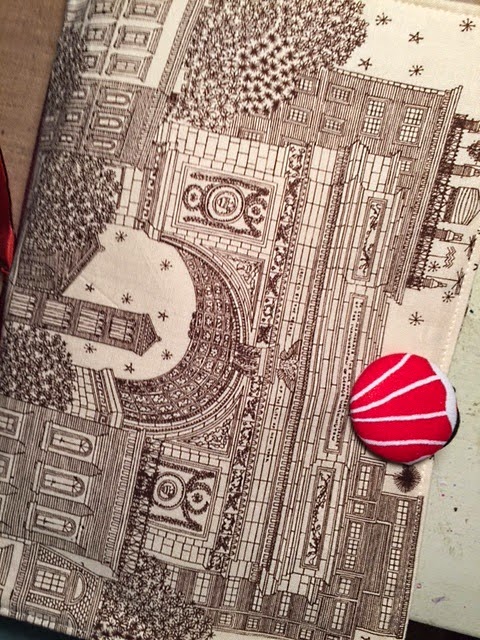
I spent part of the weekend with some of my favorite art supplies...Wendy Vecchi embossing paste, stencils (from Donna Downey and Seth Apter), and Dina Wakley paints...and I created a fun new art journal page.  To start, I picked up a Donna Downey art journal before Christmas (Merry Christmas to me!) and I love it...check out the pretty fabric cover...
 This is a small journal...around 6x9...and I love the smaller size; feels much more manageable when creating vs. tackling a 9x12 or larger piece of paper.  Also, the inside pages are super thick and sturdy and each page has an inclusion.  I'm really happy with this journal and imagine I'll be purchasing more of them in the future.

 A few weeks ago, Donna included a photo of one of her projects in a recent email blast about her new Inspiration Wednesday videos.  I loved the texture of her piece so I set out to create something similar.  I don't know how Donna created her piece, but these are the steps that I took to make my pages.  


I started by using a palette knife to add embossing paste over the entire background of my page and the inclusion.  I allowed this to dry overnight (it was thick!)  I then went back and used stencils and more embossing paste to add a second layer.  Allow to dry overnight.  Next, I gesso'd over all of the pages and paste.  Once that I was dry, I added my paint, starting with Dina Wakley's Night.  Once the first paint layer was dry, I mixed Dina's Turquoise paint and glazing fluid together (equal parts) and applied the paint over almost all of the Night painted pages.  Allow the Turquoise to sit for about a minute and then use a baby wipe to remove some of the Turquoise paint.  (This is a technique I learned from Donna Downey)
 The last layer was a combination of Dina's Tangerine paint mixed with Golden's Burnt Sienna.  This layer was lightly brushed on and then I used a baby wipe to blend.  The last thing I did was add a quote (from a Wendy Vecchi stamp set) and date tag, ala Donna Downey.  (I have to share that I love adding those dates tags...it is so much fun to go back through your journal pages and see what you were creating on a certain date.  Very cool way to see how your art progresses.)
When I finished both pages I thought, "hey, this looks like a Seth Apter page!"  Just goes to how we're influenced by the artist's work we most admire.  This ended up reminding me of the 52 Card Pick Up class that I took with Seth...very similar colors...and the texture is all Donna Downey.  And I love all of the texture...embossing paste to the rescue, that stuff is AWESOME, thank you Wendy Vecchi!  Now that my first pages are done, it's time to get to work on the rest of my journal...

Wednesday, January 21, 2015

Sweet 'n Sassy Guest Post

I'm posting over on the Sweet 'n Sassy blog today!  Hop on over to check out all of the details.