photo kime5_zps3df5231d.png  photo kime6_zpsa90859c6.png  photo kime7_zps9d2ef86d.png  photo kime9_zpsb23b4278.png

Sunday, August 25, 2019

Decorated Die Cuts


Hello strangers! If anyone is still reading my blog...I'm sorry for the extremely long absence! We moved (yes, again!) in February and thought that purchasing a home that needed a lot of work was a good thing. LOL! It's actually been good, but a very long process. We're mostly done with a decent renovation of our downstairs, which included a new kitchen, bathroom, and gutting of a living room area, and life is finally getting back to a fairly normal pace. I have a darling craft area in the new place, but crafting has taken a back seat to the other work that needed to be finished. While there is still a lot of organizing work to be done in the crafty area, I'm at least able to finally sneak in a bit of fun time. I've so missed creating and am looking forward to getting back into a regular habit of posting. I have a brand new video to share to click the link below to learn more about today's cards! 

Supplies:

You Are Loved Card

Thinking of You Card

Wednesday, February 27, 2019

Stampotique Guest Designer - Birds and Bees Card


It's my last week as one of the Stampotique guest designers and I had such a great month! Thank you so much to Stampotique for offering me this spot. It's been a while since I've had time to be creative and this was the perfect reason to get inky. I had a wonderful time! And just a little FYI before I post my final project. I know it's been ages since I've posted on my blog. Almost two years ago I accepted a full-time offer for work and that has made it nearly impossible for me to find the time to create. On top of that, our family is moving yet again (it's a good thing!!) and my entire craft room is packed and will remain packed for a few months. Please feel free to follow me on Instagram (kim.schofield.12) where I'll be sharing sneak peeks into what's going on with us along with a lot of cat photos! :-) I'll be back to crafting and posting as soon as I can!!

On to today's project, which is supposed to feature birds and bees...but my card features butterflies and a place where you'd find birds and bees...that works, right?
I started my card by creating a background using Distress Oxide inks and water. I used a blending tool to apply the color and then spritzed on some water to create some fun texture.
I then used the Thinking of You stamp and Hickory Smoke Distress Ink to repeatably stamp the sentiment over the entire background, making sure to alter the location of the image so it wasn't in a straight line.
My pretty floral image was stamped on Neenah Solor White cardstock and colored with Copic markers. I did add some shimmer to the butterfly wings, but it's tough to see in photos. I ended up not using the sentiment I colored, but using the Love one instead, which was heat embossed on black cardstock using white embossing powders.
I fussy cut the floral image and popped it up on white cardstock for a little dimension. My main image was added to the card front with the sentiment and a few gems.

Thanks again for following along this month and thanks to Stampotique for asking me to be a guest designer. I had a blast! Happy crafting!

Products:

Wednesday, February 20, 2019

Stampotique Guest Designer - All About Pets Card


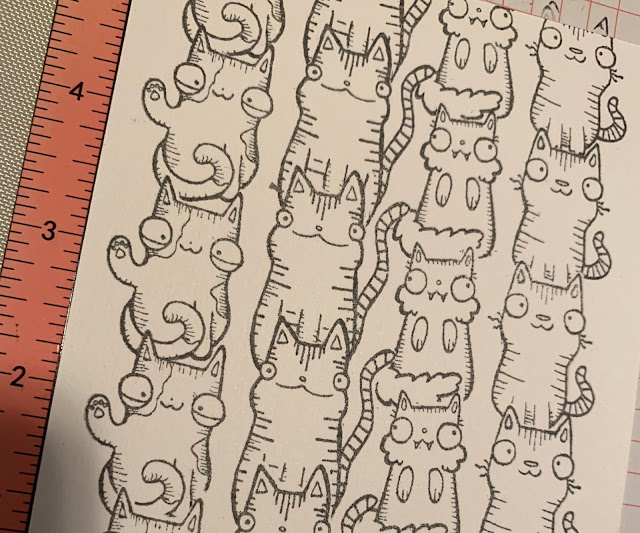
Happy Meow Day, friends! (I'm not sure that's an actual holiday...but it should be!) I'm back for week three of my Stampotique guest designer spot and am excited that we're continuing last week's theme of All About Pets. One cat is good, but it's not as fabulous as 50 cats! And while I don't have a video for you today, I am going to share step-by-step photos of today's card, which is super simple to create and includes a fun technique. So let's go!

I'm starting out with my Mini Misti, Neenah Solar White cardstock, Post-in Note tape, and Wendy Vecchi Archival Ink in my all time favorite color, Watering Can. While you don't need to have a Misti for this technique it is helpful. You will also want to use Archival Inks if you intend to watercolor as this ink is water proof. Lastly, the Stampotique stamps are wood mounted stamps, which would normally be impossible to use with a Misti. However, you can remove the red rubber from the blocks and simply use double sided tape to hold them on your stamping block. Easy peasy!

I started by stamping one row of cats and them stamping a second time (without re-inking) on to the Post-It Note tape. Next, I fussy cut out the row of cats, use the mask to cover the first row of cats, and re-stamp the next row of stamps. Notice that I only masked off the heads of the cats because that's all I needed.
Once you're done, you have an entire card full of cats!! I did trim down this piece of cardstock a bit so that there wasn't as much white space around the edges. Now to get working on my focal point image.

I stamped another row of cats on a second piece of cardstock, and used Distress Inks to watercolor one cat image. (I am using watercolor paper for this project!) To use Distress Inks for watercoloring, simple smoosh some ink from the ink pad onto a non-stick craft sheet and use a water brush to pick up the color. I'm a big fan of the water brushes with the water in the barrel, makes coloring super simple.
I fussy cut out the cat, die cut a large circle out of gray cardstock, and repeatably stamped the Purfect sentiment on the circle. I also stamped this hysterical sentiment on white cardstock and individually cut out the words.
To finish my card, I added a 2" piece of vellum to the cat card background, which was mounted to a dark gray card base. I then attached the circle, cat, and sentiment using foam tape. A few sparkly gems added the finishing touch to this sassy kitty card. (And my cat is painted like our cat, Sasha.) Super fun project, I hope you enjoyed! Happy Crafting!

Products:
-Kitty Squad stamp (how great is that stamp name!)

Wednesday, February 13, 2019

Stampotique Guest Designer - Art Journal Layout


Greetings and welcome back to week two of my Stampotique guest designer post! This week our challenge is all about pets and I cracked up when I saw the sentiments in the stamp that I used with today's project. It's the perfect match to go with this darling cat image. If you have cats, you know exactly what I'm talking about! LOL! Today's project was a super simple project that I combined with some scrap paper I created years ago at a gelli plate glass. Don't throw out those papers...you'll use them eventually! I also have another video for you this week so sit back, relax, and enjoy the show! Happy Crafting!


Products:
-Brushes - The brushes are still available!

Wednesday, February 6, 2019

Stampbotique Guest Designer - Art Journal Layout


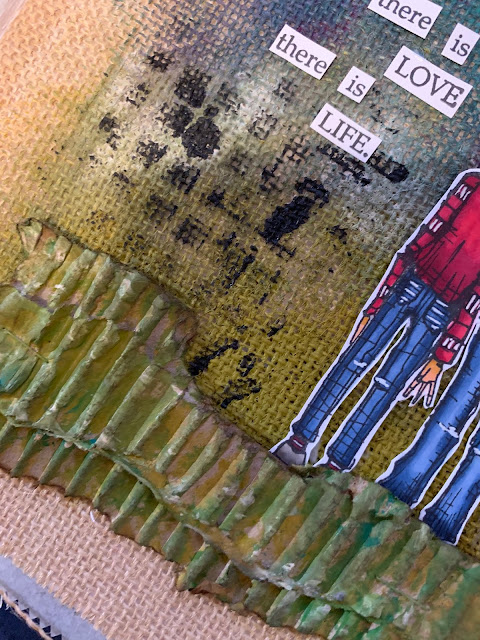
Hello friends and welcome to this week's project! I'm so excited to be a guest designer for Stampotique for the month of February. During this month, I will be posting a project every week so be sure to check back next week! Each week Stampotique includes a theme or challenge for their posts and this week it was to use cardboard in your project. I opted to create an art journal layout using products from Dina Wakley and Stampotique. And to make these super easy, I have a step-by-step video for you to watch to see how this project came together. Product links below the video. Thanks so much to Stampotique for the opportunity to use their lovely stamps for this month! Happy crafting!


Products:
-Brushes - The brushes are still available!