Hi friends! Today I'm sharing a quick and easy technique for creating amazing backgrounds....Gesso Resist! Here are the materials you're going to need:
I'm using a piece of watercolor paper (you'll need a heavier cardstock for this technique), gesso (Liquitex is my fav), a sponge, and background stamp, I'm using theTypewriter Textbackground stamp from Sweet 'n Sassy.
Put some gesso on a non-stick craft sheet and use the sponge to apply a thin layer of gesso on to the stamp. Use a light hand to apply the gesso as too much will create a puddle of paint and will keep the edges of the design from being crisp. (You can see how the top of the stamp has a little too much paint)
Stamp onto the piece of watercolor paper. You'll see that some of the archival ink, that was on my stamp 'cause I never clean my stamp, came off with the gesso. This won't affect the results. Be sure to clean your stamp immediately after stamping as the gesso will harden and effect the use of your stamp.
Next, grab a few Distress Stains and a water bottle. Apply the Distress Stains to a non-stick craft sheet, you can see my bottles above each color, and then spritz the stains with some water. This will allow the color to freely move over the watercolor paper.
Swipe the cardstock through the ink. Be careful not to move the cardstock around too much or your colors will become muddy (well, my colors would 'cause I'm using colors on the opposite side of the color wheel! LOL!). Spritz your cardstock with more water if you want the color to move around more.
Check out these results! Ohhh...love it! The gesso resists the stains, making the background design pop out...love it! You can see how I allowed the stains to drip off of the page. I had originally intended to cut a shape out of this piece of paper, but I loved the drips so much I use the entire piece!
I finished my card by adding a flower from the Lovely Lotus stamp set, colored with Faber Castell watercolor pencils, a few dragonflies, from the same set, and a sentiment.
Hope you enjoyed today's tutorial!! If you're interested in more of my video tutorials, including other gesso resist projects, subscribe to my You Tube Channel, here.
Do these projects look familiar? My apologizes for the repeat...The card above was posted in early June of this year. I had, at the time that I made the card and mini book, recorded a video, which ended up being "stuck" on my iPhone. (Call me technically challenged)
Fast forward three months and I finally managed to get the video off of my phone and uploaded to my You Tube channel! WooHoo! So...you're getting the photos again, but the video of how I created both projects for the first time. (As for that video...the framing is all wrong...I still need technical help! LOL!) Check out the video at the end of today's post.
In class news...
-I have one more seat left in this weekend's (10/3) Art Journaling Made Simple class. The class runs from 1-5 pm and the cost is $50. The cost of the class includes a Dylusions journal, which we'll work in to create three art journal spreads. Email me at ksdm@comcast.net to register and for other questions.
-Michaels in Epping, NH - I'll be teaching at Michaels on 10/23, 11/6, and 11/13. More specific details to follow, but each of the classes run from 6:30-8:30 pm. Two will be focused on art journaling and the third will be a card making class. I'll share class samples just as soon as I have them!
In personal news...
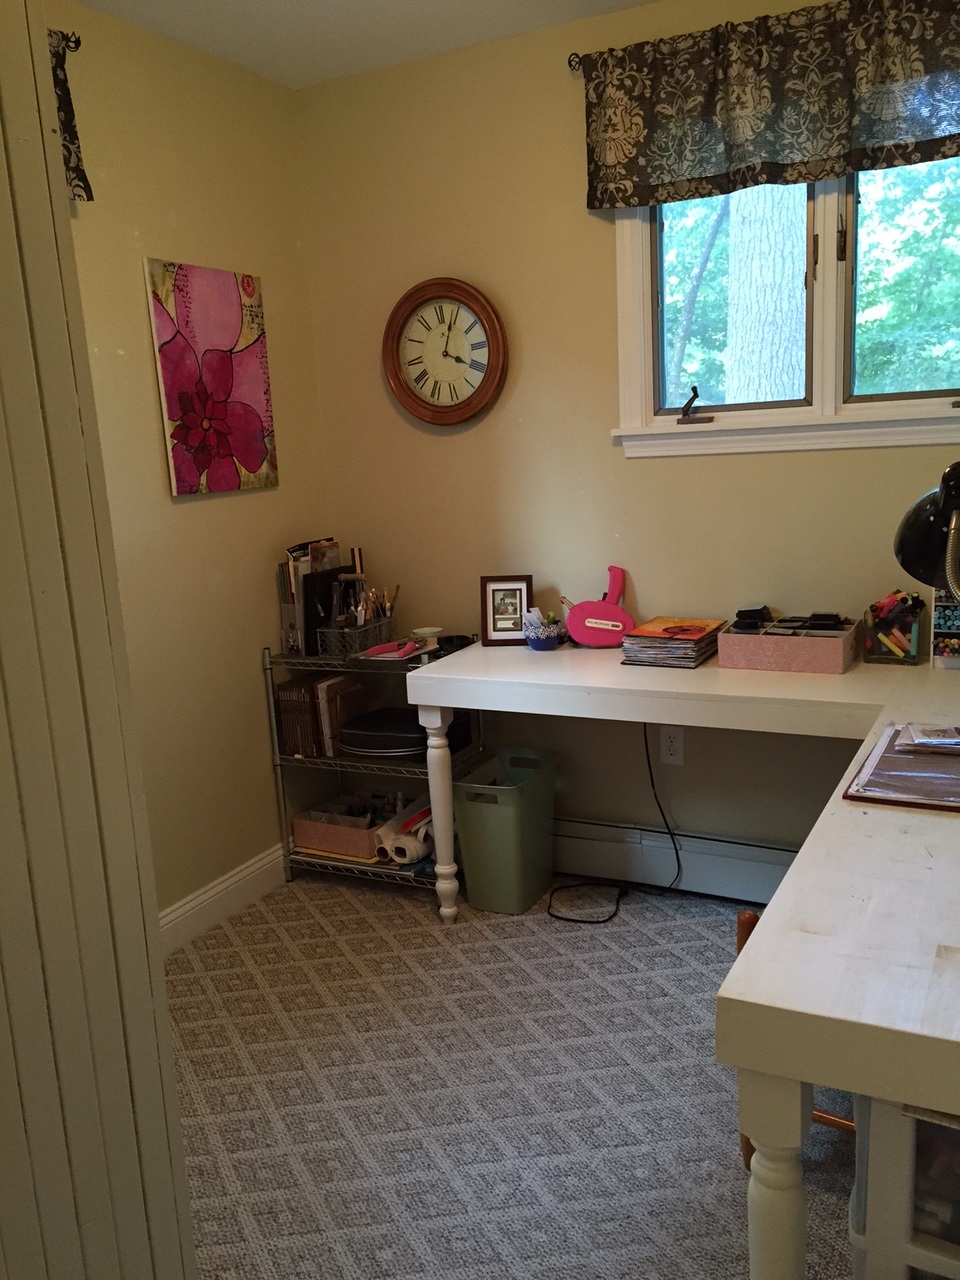
After six months, I'm pleased to report that my husband has found a job!! We're thrilled! The down side is that it will require our family to move. UGH! We'll be looking in the western NH and northern CT areas. While we're excited about a new career chapter, we're all a bit overwhelmed at the thought of moving. Our house goes on the market this week...sigh...and in preparation we've been in major packing/clean up mode. I just had to share how my studio looks now...it's never been so clean!
Almost all of my craft supplies have been put into storage. I only left out paint, stencils, and my art journals. I'm curious to see if I can go without much of my other supplies....if so, I think there's going to be a big purge on the horizon! Now on to the video; I hope you enjoy!
I'm super excited that eclectic Paperie is being featured in the PaperHaus Fall Spendor Blog Hop! We've been an advertiser in PaperHaus and just adore their online magazine. It is filled with stunningly beautiful projects! Be sure to check out the latest fall issue!
Click here to check out all of the projects created by eclectic Paperie's design team...they are AMAZING!!
Want to learn more about my art journal project? I created a quick video, which showcases the steps I took to create this two-page, fall-inspired spread! (Product links below the video)
Greetings and welcome back! Believe it or not I'm posting for the fourth day in a row...it has to be a record! LOL! The truth is, I have a ton of projects that I need to post and as much as I felt like just relaxing tonight, I couldn't wait to share my latest project and latest product love...Ferro!
Ferro is an amazing product, produced by Viva Decor, that is a type of very thick paste with a coarse texture. You can use it on any surface (even outdoor surfaces!) and it works with paper, stencils, on walls, glass and plastic...it's the perfect material! And it comes with this stunning shimmer...not too much, just enough to add some pizazz!
For today's project, I have a few photos to share but there is also a video at the end of the post...so let's get started!
I began making my tag by die cutting a dress form shape from Tim Holtz's Alterations collection. I cut the shape out of chipboard and designer paper. I then took a bit of the Graphite Ferro, placed it on my non-stick craft sheet, and watered it down. Once the Ferro was well mixed, I used a brush to brush a thin coat on the top of the paper dress, see photo below.
You can just see that light shimmer...so pretty! I could stop there and just decorate the dress but I wanted to use a stencil so I pulled out the new Quartrefoil stencil! This time I used the Ferro full strength and applied it through the stencil. Check out the amazing results!
Isn't that amazing? Oh man, I love this stuff!! And you should see all the beautiful colors...swoon... Once the Ferro was dry (this will take a while, depending on how thick the Ferro is applied...you can use a heat tool to speed up the process) I decorated my dress with ribbon and some liquid pearls. Fun stuff! Imagine all of the different dresses you could make...
To decorate my tag I used Dylusions Ink Sprays, a few stencils, and some paint splats. I then stamped a sentiment, from the Way with Words stamp set, on to a manila tag, cut the words apart, and attached it to the tag. Want to see more? Check out my video below, along with links to all of the products! Enjoy!
Hi there and welcome to Tuesday! Today I'm sharing a tutorial in the Sweet 'n Sassy forum on using the new Distress Markers from Tim Holtz to watercolor an image.
Remember that video I mentioned last week? It's up and it's live! You can view it on the Sweet 'n Sassy Forum on Splitcoast. Here's the card I made for the video...Enjoy!
Greetings!! I hope everyone is doing well and had a lovely holiday! We celebrated Christmas yesterday and so I'm just started to come out of the holiday fog! I'm at work today and enjoying be back out among all the fabulous paper crafting goodness!
Today it feels odd to not share a holiday card or project (although I do have more to share later this week!) but I thought I'd share a quick video tutorial that I created a few weeks ago for the store blog. This is a card created using Elizabeth Craft Designs stickers. These are great outline stickers that can be filled with glitter and then colored...very cool (and very quick and easy!)
Here's a close up shot of all that amazing sparkle and shine! The designer paper is from Fancy Pants Design and the rhinestone swirl is from Zva. And here is the video - enjoy!
You know it's been a busy week when you're searching through your photos to find something to post on your blog that hasn't already been posted! Whew!! I feel like I've been running at top speed all week and I haven't managed to sit down to create anything in days! However, I did manage to find this lovely little creation that I made months ago when I had toyed with holding a landscape-themed class at Wholly Scrap. (Note to self - get that class scheduled!)
This landscape was created following a Michelle Zindorf tutorial. If you've never been to her site you must check it out! Michelle is an extremely talented artist and she's been sweet enough to share tutorials on how to recreate her techniques on your own. She provided detailed instructions and photos. And as difficult as some of the cards look, the techniques are easy to follow and duplicate. The only change for me? Michelle is the queen of the brayer and honestly, I can never get my brayering to look like hers so I just use sponges for my coloring.
This look was created by first sponging color onto the top of the card, using an ink pad and the direct to paper technique (behind the trees) to create a kind of forest look, and a piece of paper to create the line between the sky, water, and tree line. The trees, from Gina K set, were stamped in black over the skyline.
I then set to work on the water section by covering the entire tree/sky area first. Color was sponged on and then the trees were stamped again but in a pale gray color so it looks like a reflection. Here's something else that Michelle does that panicked me the first time I did it...she adds black ink to the card edges. It seems so dark at first but after you get all the black on the edges, it's beautiful! The dark edge makes the entire piece pop! I finished by using a white gel pen to create movement in the water. A sentiment was also added on top of the water.
Hop on over to Michelle's blog and check out all of her awesome work!!
Enjoy (I hope to be back tomorrow with some more photos from my Week in the Life project!!)
Here's a sample of a technique card that I'll be teaching at at class tonight, along with this card and this card. We've started a new PMS (that would be Pizza, Music, and Stamping) class at Wholly Scrap and tonight is our first class! I'm looking forward to hanging out with the girls from the store and teaching them a few new techniques. Since many of the customers at Wholly Scrap are, well, scrapbookers, it's been fun to teach many of them the basics of stamping. (Yes, I am actively working to get them hooked on stamping! LOL!)
This is a quick and easy card that showcases the faux stitching technique, one of my favorites, along with a darling deer image from TPC Studio. To highlight the image, I cut out a decorative shape with my Nestibilities and used a little ink for shading before adhering my deer with dimensional foam tape. A button and some twine were my finishing touches!
Enjoy! And if you're in the NH, ME, or MA area check out the class schedule at Wholly Scrap, we'd love to have you visit!
The latest issue of Scrapbook News & Review has been posted! This month, I have an article on embossing posted in the stamping section. You'll need subscribe in order to read the entire piece but it's only $4.99/month to join and have access to hundreds of layouts, tutorials, and techniques so get on over their and subscribe!
Included with my article is a tutorial on the faux cloisonne technique. For those of you who don't know...I didn't...Cloisonne is an ancient, multi-step metalworking technique that is used to produce jewelry, vases, and other decorative items. The technique can be used for enamel or for gemstone inlays. In either variety, the shape making part of the design is surrounded by a thin metal edge to form a compartment. With enamel, liquid enamel is poured to fill the compartment with gemstones, a pre-cut matching piece of inlay is then hammered and glued into place. Whew!! That's seems like a lot of work...Good thing all you need is a few old magazines and a jar of gold embossing powder to recreate the same look.
Creating a cloisonne look is super easy and a great way to add bold, colorful images to cards and scrapbook pages. You'll need to read the SNR article for the entire tutorial but I will provide you with two helpful hints; 1) I found that using a picture with lighter colors worked better than darker and 2) this technique is meant to work with outline stamp images.
And here is my finished card, complete with two faux cloisonne flowers! The floral images are from Papertreyink and I believe (this card was made a few months ago) that the paper is from Bo Bunny, which was purchased at my local scrapbook store, Wholly Scrap.
I loved trying out this technique since I never have before...how about you? Have you done this technique before, did you like it, have any cards you'd like to share?? :-) Feel free to leave a comment with a link back to your gallery...I'd love it see your work!
Enjoy your Friday!!
Lately, I've been thinking that I would like to share more techniques and tutorials on my blog and over the weekend I had a tutorial posted on the Scrapbook News & Review site to promote a Shirley's 2 Girls event. (BTW...Shirley's 2 Girls have some adorable images! Be sure to click through to their site!) I thought I'd share the tutorial with you here as well! And perhaps this is a good start to getting me to create regularly scheduled step-by-step instructions...perhaps...
I got the idea for this card from a friend of mine who attends my monthly stamping classes. She brought over a card that she had received for her birthday and I was so intrigued by the fun step design. I took a few photos and recreated the card using a Shirley's 2 Girls stamps set, Fall Gracie, and some Bo Bunny patterned paper.
These are the supplies you'll need to create this card:
Paper cutter
Scoring tool
Coordinating patterned paper
White or cream cardstock
Adhesive (glue dots, dimensional tape)
Embellishments
And here's how to make the card:
Cut card base to 5 ½” x 11”
Score at 2 ¼”, 5”, 7”, 9”, and 10”
Starting with the 2 ¼” section, fold backwards, and then accordion fold the remaining sections
Decorate two front panels with patterned paper
Cut a 5 ½” x 4 ¼” panel, layer with patterned paper and decorate with images/sentiment/embellishments – set aside Stamp images three times on white cardstock, color with medium of choice. Cut out individual portions of the image (For example, I separated the sections of one stamp and cut out the leaves, the girl, and the background. However, this card could also be created using individual stamps.)
Using dimensional tape, attach images to the two front panels. Then stamp sentiment and attach to front panel with brads. Attach third panel, previously decorated, to last "step."If desired, add other embellishments or Stickles. Once card is folded, it will fit into a standard card envelope.
Isn't that a fun card design! And it even looks adorable when it's folded. Since I separated each of the elements of the one stamp, when it's folded they all fit back together again. Fun!!
I hope you enjoyed today's tutorial and if you're feeling inspired...please leave me a comment with a link back to your creation. I'd love to see your designs!
Enjoy!










 Starting with the 2 ¼” section, fold backwards, and then accordion fold the remaining sections
  Decorate two front panels with patterned paper
 Cut a 5 ½” x 4 ¼” panel, layer with patterned paper and decorate with images/sentiment/embellishments – set aside
  Stamp images three times on white cardstock, color with medium of choice. Cut out individual portions of the image (For example, I separated the sections of one stamp and cut out the leaves, the girl, and the background. However, this card could also be created using individual stamps.)
 Using dimensional tape, attach images to the two front panels. Then stamp sentiment and attach to front panel with brads. Attach third panel, previously decorated, to last "step."
 If desired, add other embellishments or Stickles. Once card is folded, it will fit into a standard card envelope.
 Isn't that a fun card design! And it even looks adorable when it's folded. Since I separated each of the elements of the one stamp, when it's folded they all fit back together again. Fun!!
I hope you enjoyed today's tutorial and if you're feeling inspired...please leave me a comment with a link back to your creation. I'd love to see your designs!
Enjoy!
Isn't that a fun card design! And it even looks adorable when it's folded. Since I separated each of the elements of the one stamp, when it's folded they all fit back together again. Fun!!
I hope you enjoyed today's tutorial and if you're feeling inspired...please leave me a comment with a link back to your creation. I'd love to see your designs!
Enjoy!
