I'm in love, and I mean in love, with my
art journal,
acrylic paints, and rub ons! I find that I spend time during the day thinking about what to try next, as I'm still in the learning and experimenting phase, and trying to find the time to try out my ideas.
I will share that I'm so thankful to
Donna Downey and her weekly videos. They have been a great source of inspiration and have even helped me get over those times when I'm not sure what to do next. The biggest thing I've learned is that if you're not happy with how your page is turning out...you can just cover it up! I'm always amazed that Donna's pages turn out so differently than how she started...it's all about those layers! I also feel like I have a giant product wish list started that has continued to grow but I'm trying to add to the stash slowly and make due with what I have on hand.
Today's project was quite a journey...one that took me about two weeks to complete...Here's how it started...
Last week
Sweet 'n Sassy released this great
Poppy Background stamp. This is one big 'ol flower stamp...probably 4" in diameter. My pages started with one idea and finished quite differently than I originally intended. My initial though had been to do more of a watercolor affect but I ended up diving head first into my acrylics.
I started by using
VersaMark ink to stamp the Poppy Background image multiple times across two journal pages. I then embossed each flower with white embossing powder.
I then used
Distress Paint (
Bundled Sage and
Broken China) to color in the top and bottom portions of the pages. Since Distress Paints are very fluid, I was able to use water to move the paint around the flowers. I then used
Adirondack Paint Dabbers (
Mountain Rose and
Cranberry) and water to paint the flowers. Since the embossing resists the paint, I was able to maintain the lines of the flowers.
And then...I got stuck...I added some
embossing paste, using the
Turkish Grunge stencil, and then I used
Dylusions Ink Sprays and a different stencil and this was my thought, "well, I ruined that page..." I hated the look (sorry I didn't take a picture of the ugly pages) and really didn't know what to do with the pages so I set my journal aside and spent about a week thinking, going in to peek at the pages again to see if I still disliked the look (yup), and checking out some other art on Donna's blog. And then...an idea developed...I needed to cover up these pages with more paint!
So that's what I did! I went plum crazy with paint! I grabbed a bunch of paint dabbers
(Bottle,
Lettuce,
Denim,
Pool, Aqua,
Willow,
Pitch Black,
Snow Cap, and
Sunshine Yellow), a paper plate, a paper towel, and I got to work! Notice I didn't mention a brush...that's because I did the whole background with my fingers...love that! Looking at the piece as a whole I can tell that I still need to work on blending the darker colors into the background more but once I added the paint, covering up my stencil work, I was so much happier.
And then I even covered the poppies! I was able to use the stamped, embossed image as a guideline for where to paint the poppies and, as you'll see in the photos below, you can still see the embossed lines. I also love the look of the paint covering the embossing paste. The last thing I did was add black to the edges of the pages. Black just does something to bring everything together.
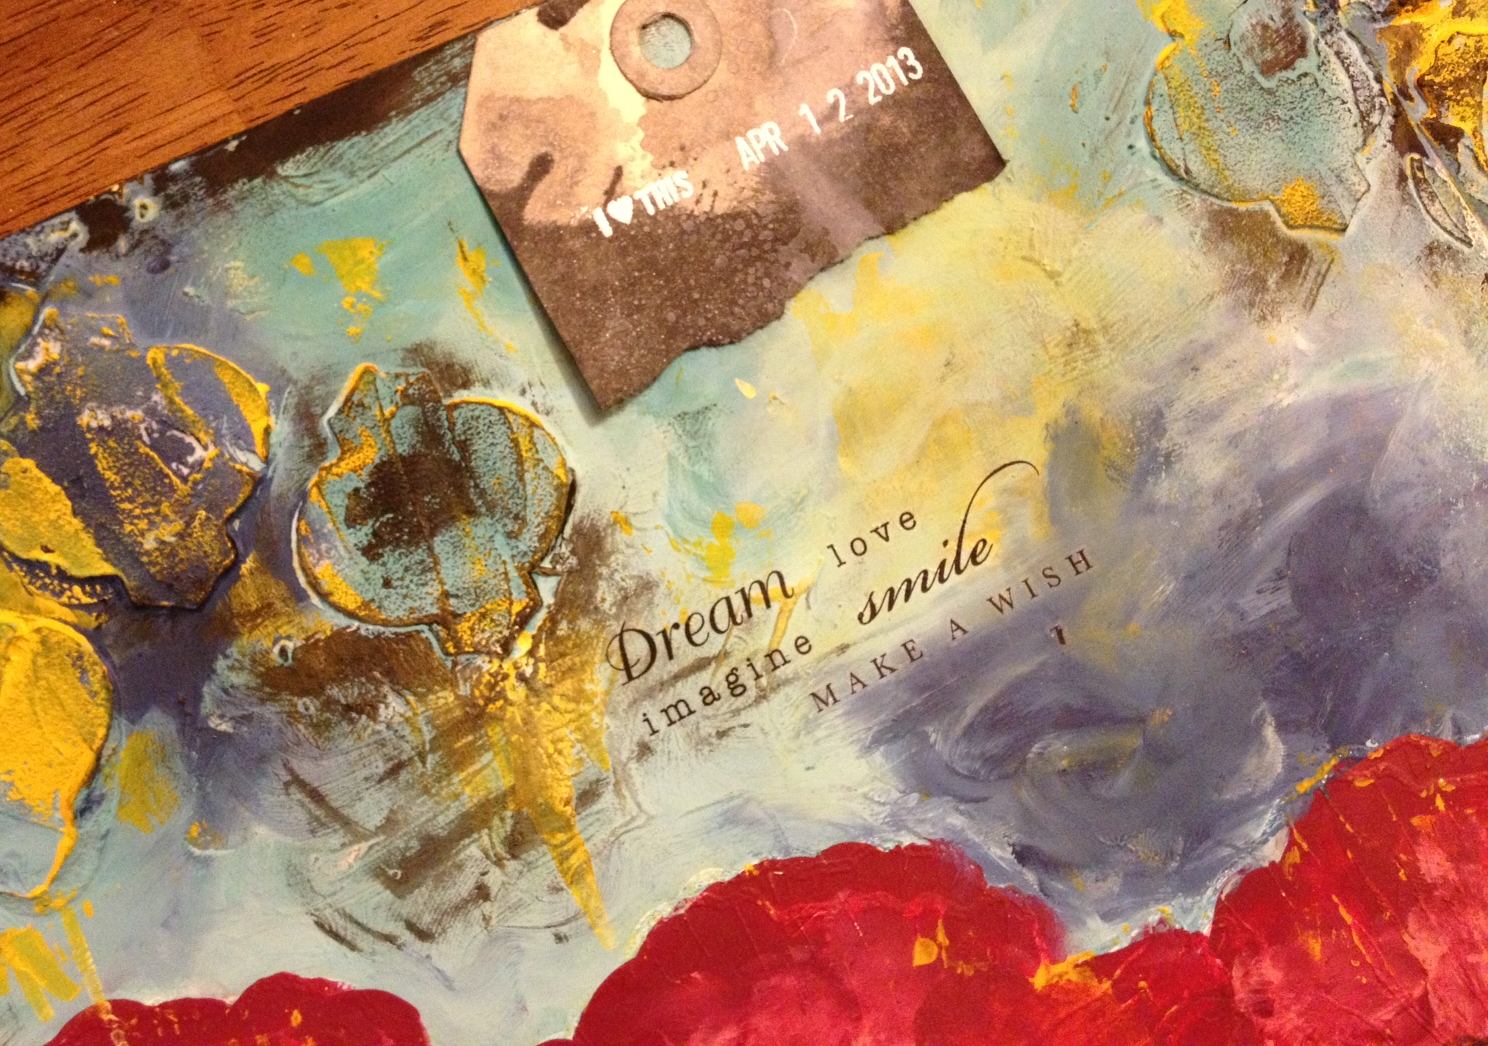
Here's a close up of the flowers, where you can see the embossed lines. I also used a whole bunch of rub ons that I've had in my stash forever. These are all from my Stampin' Up days...so they are old! I even like to just rub on a portion of the image, very vintage.
Here are some more of the rub ons and the great embossed pattern with the paint...swoon...I love it! I also love the portion of the tag I added (this is totally a Donna thing), which was created by my nine-year old. He loves paint and tags and a few months ago we spent a day just playing, this is one of the tags he created. There's even a little #2 up in the corner where he was keeping track of how many tags he made. I love that there's a tiny bit of his creative work on these pages.
The date stamp is from the Smashed book product line and I love how it has little sayings to go along with the date. I embossed the date in white so it would stand out on the dark tag.
Here's the top of the second page, with more fabulous rub ons...love that giant Life is Good up in the corner. I also added a few butterflies from one of Sweet 'n Sassy silhouette stamp sets (you should check them out...she has the
best silhouette images...love them!)
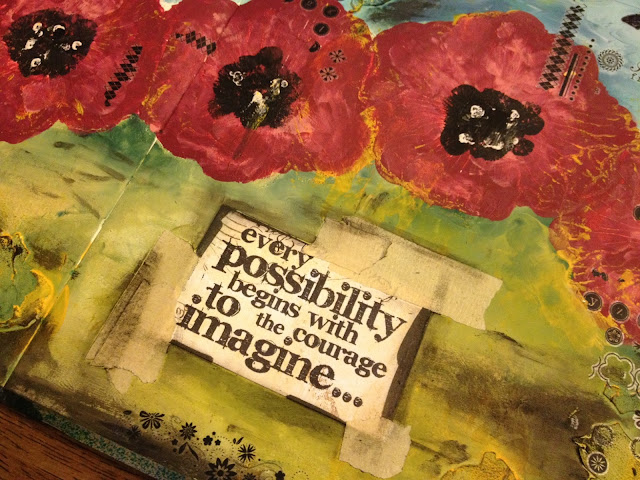
I I ended my piece by stamping this Tim sentiment on a piece of designer paper. I attached the sentiment with
3-in-1 glue and then added the pieces of masking tape (another Donna technique). I really need to get my hands on some washi tape but I got nothin' so I went with the masking tape and I do really like the contrast. The black lines came from a Faber Castell Big Brush Marker. These markers stay wet for just a few seconds, giving you time to spread the color.
A few things I noticed after I finished my page and went back through my older pages...I've been using the same color pallet, images, and sentiments too frequently. It's where I'm comfortable and I think creating the same type of look over and over again is typical of someone who is just learning...you stay with what you know or what you've recently learned. But it's time to step out of the box and try something new...I'm looking forward to the next adventure...
Happy Crafting!