Friday, January 30, 2015

Life Book Lesson #4

Just a quick post today...our entire household has come down with the flu...it stinks and we all feel awful.  I feel slightly less awful right now so I'm taking this opportunity to try and get a little bit of work and posting done before going back to my recovery spot on the couch.

This was our fourth lesson, a mini lesson, and let me tell you...it was hard!  The face was actually the easiest part and I love this style...super quick and easy, not too fussy, just perfect.  Adding a body was a whole other issue!  The script around her waist reads "this was hard!" LOL!  I got the proportions all wrong the first time and I had to gesso over everything but her head and start again.  The second time around was better, but still could still use some work.  I did really enjoy the lesson and the look of this girl so my message to myself is to "be brave" and try another ballerina girl again in the future!

Enjoy!  And now...back to the couch...

Friday, January 23, 2015

Choose Joy

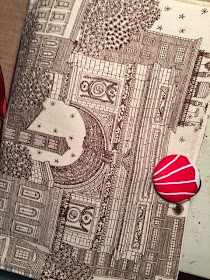
I spent part of the weekend with some of my favorite art supplies...Wendy Vecchi embossing paste, stencils (from Donna Downey and Seth Apter), and Dina Wakley paints...and I created a fun new art journal page.  To start, I picked up a Donna Downey art journal before Christmas (Merry Christmas to me!) and I love it...check out the pretty fabric cover...
 This is a small journal...around 6x9...and I love the smaller size; feels much more manageable when creating vs. tackling a 9x12 or larger piece of paper.  Also, the inside pages are super thick and sturdy and each page has an inclusion.  I'm really happy with this journal and imagine I'll be purchasing more of them in the future.

 A few weeks ago, Donna included a photo of one of her projects in a recent email blast about her new Inspiration Wednesday videos.  I loved the texture of her piece so I set out to create something similar.  I don't know how Donna created her piece, but these are the steps that I took to make my pages.  


I started by using a palette knife to add embossing paste over the entire background of my page and the inclusion.  I allowed this to dry overnight (it was thick!)  I then went back and used stencils and more embossing paste to add a second layer.  Allow to dry overnight.  Next, I gesso'd over all of the pages and paste.  Once that I was dry, I added my paint, starting with Dina Wakley's Night.  Once the first paint layer was dry, I mixed Dina's Turquoise paint and glazing fluid together (equal parts) and applied the paint over almost all of the Night painted pages.  Allow the Turquoise to sit for about a minute and then use a baby wipe to remove some of the Turquoise paint.  (This is a technique I learned from Donna Downey)
 The last layer was a combination of Dina's Tangerine paint mixed with Golden's Burnt Sienna.  This layer was lightly brushed on and then I used a baby wipe to blend.  The last thing I did was add a quote (from a Wendy Vecchi stamp set) and date tag, ala Donna Downey.  (I have to share that I love adding those dates tags...it is so much fun to go back through your journal pages and see what you were creating on a certain date.  Very cool way to see how your art progresses.)
When I finished both pages I thought, "hey, this looks like a Seth Apter page!"  Just goes to how we're influenced by the artist's work we most admire.  This ended up reminding me of the 52 Card Pick Up class that I took with Seth...very similar colors...and the texture is all Donna Downey.  And I love all of the texture...embossing paste to the rescue, that stuff is AWESOME, thank you Wendy Vecchi!  Now that my first pages are done, it's time to get to work on the rest of my journal...

Wednesday, January 21, 2015

Sweet 'n Sassy Guest Post

I'm posting over on the Sweet 'n Sassy blog today!  Hop on over to check out all of the details.
 

Monday, January 19, 2015

Life Book - Challenge #3

This past week's lesson was brought to us by the lovely and talented Joanne Sharpe!  I took one of Joanne's classes a few months ago at one of our local stores.  It was a full day class where we explored all types of writing and journaling exercises.  I had a wonderful day and came home with lots of ideas.  

True confessions...I adore Joanne's work, but I struggled with this week's lesson.  I really don't like my own handwriting and find that I can't come up with more than two ways to make letters!  LOL!  I mean by that statement that it takes too much brain power for me to think of more than two "fonts!"  **giggle**  I'm a person that likes to just start flinging paint and see where it takes me...this type of art takes more thought and planning.  However, I enjoyed the process and was happy with the final result. 

  I started my piece by first using a regular pencil to lightly outline my letters and flowers.  I then started adding my watercoloring (I did really enjoy watercoloring...I love watercolors!).  I used Peerless watercolors for the coloring.  If you've never used Peerless watercolors...you NEED them!  They are watercolor papers...easy traveling, just pack up a few pieces of paper, and easy to use.


 Once all of my watercolors were dry, I went over all of my pencil lines with a Fude Ball marker.  (Yes, I did watercolor the flowers before outlining in black)  This allowed me to change some of my lines, to add thicker lines to my large faith letters, and to add more detail to my sketch.  (Most of these flower designs were taken from Joanne's book...they are not my original ideas...only the layout is my design)

The bulk of the work was in the outlining and adding of details.  I added lines to the flowers, some doodling around the letters, the black and white patterns (love that!), and the black and white dots, which I am obsessed with adding to many coloring pieces!  I also used Copics to add a hint of shading to a few of the flowers.
 The quote on my piece is also from Joanne's book...I love that she included two pages of quotes in her book that you can use on your own art...what a great idea!

Overall, I did enjoy creating this piece, even though this is not exactly my style.  I really appreciate Joanne's work and think she is wildly talented.  I'm hoping to become more comfortable with writing as I'd like to incorporate some of her lettering styles into my art journal pages.  I also really enjoy this type of high end doodling when I'm on vacation.  We tend to camp quite a bit and bringing along a sketch book and a few pens/markers is a great activity in the evenings or to do with the kids.

Now we're on to week four of our Life Book challenges...can't wait to see what's next!

Monday, January 12, 2015

Life Book - Lesson #2

 
 This week's lesson was a fairly simple one; create a tag!  I have a ton of unfinished tags in my stash, left over from many days of demonstrating techniques (not never finishing a project), so I simply found a pre-inked tag and added all kinds of goodies!

The background was created with Distress Paint and then I added stamping and tissue wrap, which looks amazing on top of painted surfaces...transparent, but an obvious extra layer.  LOVE!  I then added the photo (from Tim's Found Relatives Cards) and embellishments.  There's washi tape, filmstrip ribbon, chipboard letters (covered with some white paint), metal embellishments, and my reminder to "show kindness everyday."  The word GRACE at the bottom is my word for 2015...

Enjoy!

Saturday, January 10, 2015

Sweet 'n Sassy Guest Post

I'm over on the Sweet 'n Sassy blog today...sharing a fun pop up card!  Click on over to check out the details.  Enjoy your weekend!

Friday, January 9, 2015

Sweet 'n Sassy Release Day

Welcome to the January Sweet 'n Sassy release day celebration!  I adore release day...such a great opportunity to see all of the amazing new designs from SNSS and to see tons of beautiful artwork!  This month's releases are listed below, along with my samples and links to the rest of the design team's work!  Enjoy!


 First up is my card featuring Sassy Cindy....and this girl is right up my alley (shh..don't let my husband know I'm sassy...oh wait, too late! LOL!)  This sentiment made me laugh out loud!  So darn funny, especially since I now fancy myself a runner (not really, but I try to make a good effort each week and only run after the ice cream truck when it's really hot outside!)
Next is what is going to become one of my favorite sets...Parisian Post.  Oh my, such great collage images in this set.  I created a mini canvas using almost all of the stamps included in the set (there's a ton!), along with a few pieces of canvas and metal.  I'll be sharing a photo tutorial of how this piece was created in the next few weeks.
Finally, I have Sweet Sara who looks sweet, but also has a darn good sense of humor.  Cake?  Count me in!

I hope you enjoyed today's cards and be sure to visit the rest of the DT's blogs...there is some stunning work out there!  Happy Hopping!

 
<![endif]-->  

Thursday, January 8, 2015

Make ART Challenge #1 - Embossing Paste

Yippee!!!  Today is the official launch of the new Wendy Vecchi Make ART Challenge blog!  I am so excited to be helping Wendy out with the blog and even more excited to be highlighting her amazing artistic talents!!  Today's challenge is all about exploring the joys of embossing paste (I LOVE it!) and you can read all of the details about the challenge here.  I also have a quick photo tutorial for you today, showing you how I created my card.

  Use a blending tool to apply Scattered Straw and Tumbled Glass Distress Ink to a piece of cardstock (pre-cut to standard card size).
Use Wendy's Dots and Dashes background stamp to lightly stamp on the background in Jet Black Archival Ink.  Set aside.
Stamp the vintage lace image from the Say It With Art stamp twice on a piece of book text (use Archival Ink).
Make hills out of the lac image!  WooHoo!!  (I also added a bit of script text to my card background, using Pumice Stone Distress Ink).  After I added the hills, I used a blending tool and the Sunburst stencil to add the sunbeams, and of course added Gathered Twigs to all edges.  Here comes the fun part!
  I used the Potting Soil and Fern Green Archival Ink Pads and smooshed them on my non-stick craft sheet.  Then I added a blob (don't you love my technical terms?) of white embossing paste to the ink.  (You can also do this same technique using re-inkers)  Mix the embossing paste with the ink...Voila...instant custom embossing paste colors!  Now I can stencil...
Using the Layered Tree stencil and my custom colored embossing paste allowed me to add a beautiful tree to the front of my card.  Wouldn't the tree be pretty in fall colors too?!  Be sure to store your extra paste in some of Wendy's Mix 'n Store jars.  Now I just need to add the finishing touches...
  I added a sentiment from the Forever Art stamp set, a bird from the License Plate Art stamp set, and a heart (embossed with Wendy's Red Geranium embossing powder) from the Little Bits stencil.  Once finished, attach the piece to a black card base. 
I hope you enjoyed today's tutorial and please be sure to check out the challenge on the NEW blog...Wendy is showing off many new products and there's a prize up for grabs!!
 

Saturday, January 3, 2015

Life Book 2015

A few months ago I made the decision to sign up for Life Book 2015.  My decision was made after taking another online class where Tamara Laporte was an instructor.  I really loved Tam's approach to teaching and felt that I learned a lot about making faces and adding details.  This was our first week's challenge and I spent a good portion of January 1, 2015 creating ART!

I had a great time creating my girl and while there are many areas that could be improved, I'm excited that I stuck with it and completed the piece.  The page was created using graphite and Stabilo pencils and paints from Dina Wakley, PaperArtsy, and Golden.  I also added some chunky glitter that has been living in my stash for many years (I knew I'd use it eventually! LOL!)  The other fun thing I used was a tiny alphabet stamp set that I purchased years ago for next to nothing.  It's one of those sets I consider dumping every time I clean my studio.  So glad I didn't because they were perfect for adding my my own sentiment, or more precisely Scripture text (from Proverbs).  Here's my completed piece...Enjoy!
 

Thursday, January 1, 2015

2015$ Challenge

Thank you for joining us today for 2015$ - Two Thousand Fifteens, a fundraising effort to help the Masse Family fund their adoption of a little girl with special needs from China!  To read more about the Masses and their adoption journey, please visit www.masseadoption.blogspot.com.  There are in excess of 150,000,000 orphans in this world today!! That number is staggering and can seem quite overwhelming, but with your help, the Masses are excited to make that number ONE LESS!

"No ONE person can do everything, but we can all do ONE thing!"

Here's the challenge:
  • The Masses are looking for 2000 people to make a one-time donation of $15.00 to their YouCaring adoption site.
  • Once you have completed your donation, please SHARE this event with your contacts, your FB friends, family, etc.  The more people who see this, the greater chance we have to reach the goal of 2000 $15.00 donations!
  • PRIZES:  For every 50 donations made, they are gifting an exclusive, handmade Bracelets For One to a randomly drawn winner!!  (Check out their Bracelets For One FB page if you're interested in purchasing a beautiful bracelet! All proceeds from your purchase go to their adoption fund!)
Thank you so much for taking the time to read and consider this worthy cause, for donating if you are able and for sharing this event.  Visit the 2015$ event page on FB to track the progress!

Hi friends!  Hoping that some of those reading my post today are able to assist my dear friend and her family bring home a sweet baby girl from China!!  Thanks so much for your consideration and support!!  XXOO  Happy New Year!